I was inspired by the cover photo on the current issue of Spin-Off, the magazine from Long Thread Media. I get this magazine as a bundle with access to their digital library and four monthly hardcopy issues of their magazines.
The magazines are Spin-Off, Handwoven, Little Looms, and Piecework. I'm not a very good spinner, despite having 4 spinning wheels. Two of them are actually usable wheels!
Well, the reason I was inspired was because the cover story featured a lovely yoke sweater knitted from hand spun yarn. The article's author used her knitting machine to knit the plain parts of the sweater and knitted the color work by hand.
I skimmed through the article, and although I noticed that the article called for a 6.0 mm standard knitting machine, I was sufficiently excited to use up some of my stashed yarn that I plunged right in. I was also excited about the wide range of sizes in the pattern, since I am plus-sized and many older patterns do not include larger sizes.
Note: a 6.0mm space between needles usually indicates a "Mid-gauge" machine. A standard-gauge machine generally has 4.5 mm spacing, and a bulkyi machine has 9.0 mm spacing.
Well, there was a photo of the author's LK-150 mid-gauge machine right there in the article, so I knew it was a mid-gauge machine, and assumed the editors of a spinning magazine couldn't be held accountable for knowing about knitting machines.
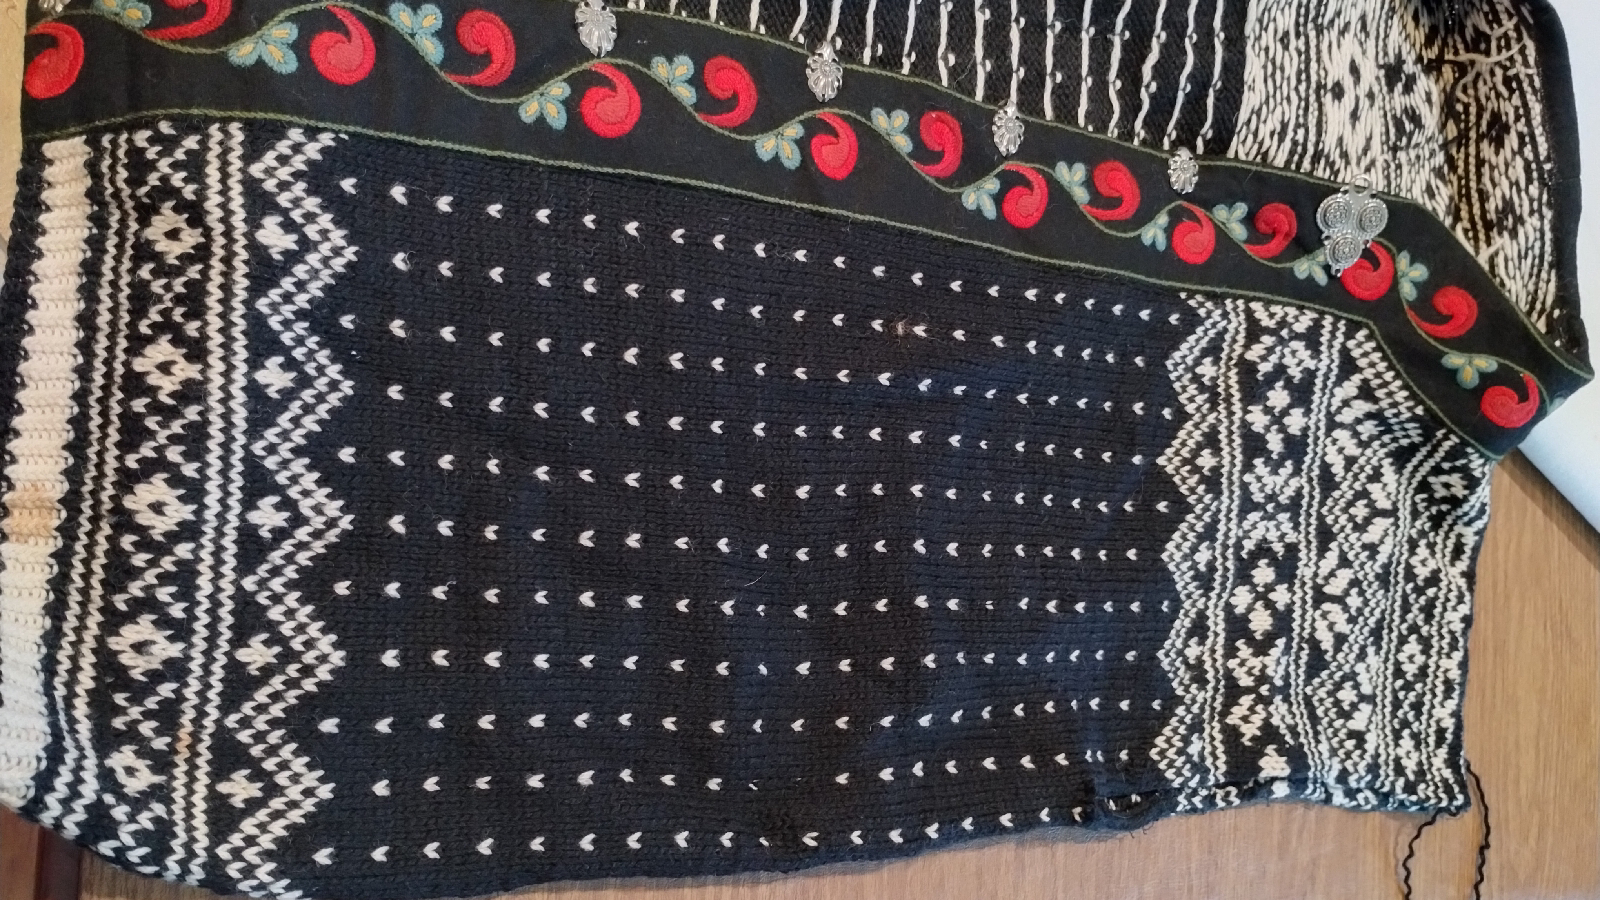
I started in on the hand-knitted yoke. I used my green Mellowspun yarn from a clearance sale at Mary Maxim for the body. I was trying to decide which of my stashed acrylic DK weight yarns would harmonize with the green and with each other. That week, I was participating in the Cleveland area Yarn Discovery Tour, and I needed to buy something at each yarn store I visited. I explained my dilemma to Peg at Peg's Knit and Spin, and she suggested this Paint yarn by Katia. The colors complemented my green yarn and each other, and I only had to buy one ball of yarn, not multiple skeins of different colors.


I started with the center of the ball for contrast color 1. Then I started with the outside of the ball for contrast color 2. After knitting the ribbing as described in the pattern and several rows of color work, I realized that I had omitted an increase every 6 stitches all around the neck on the first color work row. It was making the sweater look more like a volcano than a sweater. I was also unhappy with the length of the color changes in the contrast yarn. I couldn't think of any way to fix it without ripping it out, so that is what I did.
I rewound the Katia yarn into multiple smaller balls so that I could make the color changes when I wanted to on the do-over. Once I ripped out the color work, I decided I didn't like the way the ribbing looked either. It seemed stretched out. I ripped all the way back to the beginning.
This time, I started the ribbing with needles two sizes smaller than the size used in the body of the sweater. Surprisingly, this was not specified in the published pattern, although it is a typical instruction. I cast on my circular needles using the German twisted cast-on, which is ideal for ribbed edges like cuffs, necks and borders. As I cast on, I thought about how this cast-on could be adapted for machine knitting, especially on a mid-gauge machine with no ribber, where the stitches are latched up manually to form the ribbing. More to come in a future post on this.
The electronic version of the pattern thoughtfully includes a "coloring page" so you could mark up your own color work chart. I download the page and printed it out. I got out my colored pencils and got to work.
So this time I remembered the first-row increase in the color work chart.
I kept knitting. Eventually I dared to try it on.
It laid flatter than the first attempt, so I kept going. At this point I actually read the pattern steps in more detail to see what to do next once I completed the yoke. To my surprise, the pattern said to divide for the armholes, cast on some stitches for the underarms, AND CONTINUE KNITTING STRAIGHT.
I could not make my brain work around this. This is my first yoke sweater. The yoke is round. The center comes down farther on the front and back than it does at the underarms. I thought there needed to be short rows below the underarms to fill in some of the missing fabric.
Diagram copied from a Russian publication. Highlights are mine, to illustrate the area where I think there should be short rows.
I went to my circular sock group crank-in on Saturday and talked to a friend who has completed several yoked sweaters. She was not surprised. She said the short rows for the back length can be above the yoke or below it. I puzzled over her response. Yesterday I watched several YouTube videos about short-rowing under the yoke. All I found was that the length of the back of the sweater is longer than the front, so rows can be added above the yoke or below it in back. This pattern called for short rows above the yoke, so I had already knitted them in. I could find nothing about short rowing under the armholes.
I consulted with Irene Woods'
Facebook group for Machine knitting round yokes. I definitely think her instructions will be the way for me to go on my next project. But maybe I am too far into this project to recalculate everything and match gauges.
I split the stitches for the underarms as the pattern stated, casting on extra stitches for the underarms. I went ahead and knitted the sleeves. I measured the length I needed, and then plotted the required increases using Design-a-Knit. I cast on a circular needle, again using the German twisted cast-on, knit a few rows in 2x2 rib by hand, then transferred the open stitches to the machine. I knitted and latched up the remaining rows of rib using a tighter tension, then I used interactive knitting in Design-a-Knit (DAK) to tell me when to make my increases. I took it off on waste yarn. Easy-peasy.
Next I had to attach the sleeves to the sweater-in-progress. I transferred the sleeve stitches to a circular needle. I had never Kitchenered in the round before. The darn garment kept slipping off my lap. I kept dropping stitches. My tension was way too loose. I will never Kitchener using circular needles again.
For the second sleeve, I cut the yarn at the halfway point of the underarm stitches that I had cast on. I tied the ends together so they wouldn't unravel. Then I transferred the yoke stitches and the sleeve stitches to straight needles two sizes smaller than my main tension. Kitchenering, or grafting, the two pieces was easier using straight needles. Much easier.
Using what I had learned about short-rowing the back, I went ahead and short-rowed under the sleeves to fill in fabric so the bottom edge will be relatively straight across. I used the new-to-me Japanese shortrowing method, so that my wrap-and-turn stitches would not show. I'm not sure if I did it exactly right.
Now, I have to decide whether to hang the yoke stitches on the knitting machine and knit down to the ribbing, or whether to start with the ribbing on the knitting machine and knit up to the yoke, and kitchener the pieces together. The disadvantage of the first method is that it requires casting off on rib stitches, which is sometimes difficult to achieve a nice stretchy rib. The disadvantage of the second method is Kitchenering.
And...... There's one more complication. My body has 280 stitches. That's 140 each for front and back, plus 2 on each piece for seaming. 142 stitches. My Brother KX-350 machine has 130 needles.
I either have to knit a gusset under each arm, adding two more stitches for seams, or add a section to my knitting machine to give it more needles.