. brightmeadowknits: 2018

Friday, June 15, 2018

Michigan Fiber Festival Workshops

I will be teaching three workshops at Michigan Fiber Festival this year.

The first one is sold out.  It is an introduction to Machine Knitting - Machine Knitting 101, and is a full-day class.

Machine Knitting 101 class in Ray Township, MI in May 2018 (Image credit: Cora Foley)
The other workshops are 3-hour workshops. There is still time to register for these, and the cost goes up after July 1, so the time is now.   Click the links to register on the Michigan Fiber Festival Web site.   Check out other workshops on other fiber topics while you are there!

320 - Machine Knitting With Handspun Friday AM By Brenda Fish

 Description: Have you avoided using handspun with your knitting machine because you were told that knitting machines need fine, evenly spun or acrylic yarns to work? This seminar will demonstrate various creative ways to use handspun yarn with a mid-gauge or bulky knitting machine, using techniques such as hand-manipulation, knit-weave, and surface embellishments like embroidery, couching, or felting.
Skill Level: Intermediate
What Students Need to Bring: Small or remnant balls of handspun yarns for sampling and their knitting machine (optional).
Material Fee $5.00. Covers background yarn for samples.


330 - Hacking The Brother Kh910 Machine Knitting With AYAB Friday PM By Brenda Fish

Description: This lecture-style class surveys status and evolution of the latest developments in open-source hardware and software that use home knitting machines from the 1970’s as a foundation. The second half of the class will be a demonstration of replacing the original electronics in a KH-910 with an AYAB (All Yarns Are Beautiful) circuit board and connection to a laptop. Instructor will demonstrate generating a stitch pattern and knitting out a 2-color photo.
Skill Level: All levels
What Students Need to Bring: Note taking materials
Material Fee: None lecture class.  

Llama wall hanging downloaded to KH-910 using AYAB (Image credit: Cora Foley)


Thursday, June 7, 2018

The Zone to knit

I had lunch with my chair yoga class yesterday.  Among my fellow devotees was an author.  She and I discussed the need to devote a larger block of time to get into "the Zone" for doing your work. 

Well, that certainly happened for me today.  I started to cast on the required stitches for the back of my sweater.  I knit several rows of waste yarn, then changed to the garment yearn.  I knit a row.   Then I put the needles in hold for the second row.  That is when I realized that the tension dial was still set to 4 from my experimentation with various trims, and I needed it to be at 10.   Well, I hadn't really gotten very far yet, and I decided to just start over.

Next, I could not find my 1x1 needle pusher.   I looked everywhere.  I could not find it in the new tool roll I made (photos in an upcoming blog post), or under it.  It wasn't in any of the drawers of my rolling cart.  It wasn't on the floor, in the lid of the knitting machine, on my chair, in a magazine, or anywhere logical that I could see.  I decided to go have lunch. 

After lunch, I returned to my workroom and still did not see the tool.  So, determined, I used my original tools, my fingers, to move the needles into the 1x1 arrangement.  I knitted the first row of waste yarn.  What do you know?  There was my needle pusher tool, lying on the crossbar of the stand, directly underneath where the carriage had been.  Mystery solved.

But, what was wrong with the waste yarn? It was not lying nicely across the needles in working position.   Instead, it had sprung up in the air in several places.  I manually manipulated it back to where it should have been and hung the cast-on comb.  Or at least I tried.  I was having trouble getting all the hooks of the cast-on com to catch in the loops of the waste yarn.  Static?  A disturbance in the force?  I hadn't made the proper offering to the knitting gods before starting?  Three tries later, I decided to flip the cast-on comb over so that the hooks pointed out.  This was successful, in part because I finally realized I wasn't applying enough "drag" to the yarn that I was feeding in as waste yarn, not wanting to take the time to run it through the tension mast.  Another problem solved.  I finally knitted the required 12 rows to complete the garment side and knitted another 8 rows of waste yarn.

I wasn't really into the Zone yet.   I decided to come downstairs and see what was happening on social Media like Facebook and Ravelry.  I fully intended to look up my DropBox information to send to a friend to "carch" some files, but it completely slipped my mind until just now. 

In the meantime, my eye caught some movement outside the window, and I realized that there was a small turtle dragging his shell across my patio.  I ran and got my camera.  I wouldn't have really needed to run, because he hadn't moved far when I returned.  I snapped several pictures and posted them, and then hung around waiting for some action on his part, which turned out to be not forthcoming.

I got distracted looking at a pattern book or magazine  "Pat' s Patterns"  from the 1990s.  I had remembered a technique for enclosing edges that was demonstrated at a seminar, I think by Pat Frette, and I think I bought the book.  So while looking for it, I found this magazine from the other Pat.  It has a cute, easy to make Blouse from cotton yarn with a mock V-neck and cap sleeves formed by the excess fabric of the shoulder..  The sleeves are adjusted by a cord through eyelets at the top of the shoulder.  There are only two pieces, front and back, and no neckline or armhole finishing required.  So this should be an easy, quick garment to finish for wearing this summer.  I am pretty sure I have several cones of cotton yarn around here, although probably not the exact brand she used. I'm not fond of the fairaisle pattern across the bust, though, I'll need to adjust that.   Wonder if I can get gauge? 

So, I'm still not into the Zone, and my sweater back is still waiting for me to go finish it.   I don't know how Nancy Zieman accomplished so much in her series 10-20-30 minutes to sew.  It's not helping that I don't have a deadline.  Maybe tomorrow I need to figure out exactly how much time I have before Fiber Fest rolls around and I have to have my class curriculums completed!

Monday, June 4, 2018

Short-sleeved kimono - Part 3

I've finished the two fronts of the kimono sweater, and am thinking about the binding or trim I will be putting on it.  My original idea was that I would use the shiny, rayon yarn alone in the trim.  So after I knitted the second front, I knitted another swatch to use for the trims.  I tried hanging the bound-off edge with right side facing, knitting a row, turning it with a garter bar, and knitting a 20-row hem (turning on row 10) using a slightly slighter tension because the yarn is a finer yarn.   I did NOT like the result.  The bound-off edge was stiff, but the tighter tension made the edge wavy.  I unraveled it.

I re-hung it with right side facing again, added a second strand of the rayon and used a larger stitch size,  knit 2 rows to compensate for the roll of the fabric, then knit 5 rows and hung the hem.  Again, this did not work. 

I unraveled it again. 

I thought about using a "binding" knit and folded in half.  I tried it, and  didn't like it either.

I am going to have to get out a trim book.  I have several.  I have hardcopies of Mary Ann Oger's Band Practice and 50 Ways to love your Knitter, and I also have two in my Kindle library by Bonnie Triola "Machine Knitted Trims and Edges." One is for single-bed machines, and the other is for double-bed machines.   Probably I have others in my library, but those two (or four, actually) come to mind right away. 

I am thinking that perhaps my next step will be to experiment with an industrial rib, since the fabric of this sweater is heavier than the lighter-weight trim.   That will mean moving to a a different machine, since the 930 I am currently using does not have a ribber installed.  Or, alternatively, installing a ribber on the 930.  Decisions, decisions.


Wednesday, May 30, 2018

Short-sleeved kimono (Part 2)

I have been planning how to knit this kimono.   I think it will work best if I start at the lower left garment side (we are looking at the pattern as it hangs on the knitting machine, meaning the wrong side is facing up). 

Starting at the point I have labeled  "2" in the diagram below is the default approach in the Garment Designer instructions, but that will result in having to cast on a large number of stitches at the underarm seam.  It will also mean knitting non-continuous pieces.   It means that the increases for the angled pieces will result in a jagged seaming edge.  I prefer to seam along one-stitch knitted edge.  So I am going start instead at the point I have labelled "1" in order to short-row to achieve my smooth seam.  I'll start with the angled side and leave it hanging on the needles until I reach the same row with my sleeve. 

 I have set the zero points (origin points) at the bottom left (for rows) and the middle (for stitches). The diagram (see the red line marked "1") tells me at I will have 100 stitches at the point of a straight line (red line), between the center (0) needle and the right side (100) needle.    I cast on with waste yarn and knit several  rows, before I knit my seaming row. 

I am knitting the wedge marked "1" first, then moving to the wedge marked "2" and continuing up the sleeve. When I reach the underarm, I will knit the two pieces together as one row and continue knitting as normal.


 Garment Designer is uniquely visual in the way it prints the instructions.  You work from the bottom of the instructions up, the same way you knit your garment from the bottom to the top.  The software does the math, but it assumes I started at row 0.  Instead, I wanted to start at Row 44!  For now, I am ignoring rows 0-43.  Since I am short-rowing, instead of increasing I am putting stitches in work.  Refer to the instructions in the screen shot below in box labelled "1".  Note that the labelling is consistent from the diagram to the shaping instructions, "1" instructions refer to the wedge-shaped piece marked "1" in the diagram.

 I knit the first complete row (row 43), my seaming row, using all 100 stitches to the right of 0.  So for my first short row (per the chart,  row 44) I will pull 7 at the right stitches to working position.  Carriage is travelling left to right.   I had previously set the method of shaping in GD to shape only on alternate rows, but not strictly.  This means I can always shape on the side away from the carriage, knitting the complete row, wrapping, and returning without shaping. The second row (row 45), I pull 7 adjacent stitches to working position and knit back (row 46 has no shaping on this part, shown in box 1 below.) Row 47 I am knitting 15 additional stitches and wrapping, row 48 has no shaping.  Row 49, I pull 14 stitches back to working position. I continue on following the chart.

 Garment Designer is very visual, as I noted.  It is expecting me to be casting on these additional stitches when working from bottom to top.  It shows the increases on the left side of the section.  Because I am short-rowing and not increasing, I am working on the right side instead of the left side.  It is an adjustment I made to achieve the result I wanted.  To keep track of where I am, I started my row counter at 43 because that correlates to the lines in the instructions.  Notice that rows 50 and 56 have no shaping instructions inside box labelled "1", the shaping for those rows is on the left side of the bed, which does not even have any needles in work at this point.  When I reach row 57, I put the last 11 needles in work.


So, I have come to the end of my "wedge" that I created in box 1.  When all the needles on the right of 0 are in work, and will remain in hold while I continue knitting the sleeve, or left side of the piece as I face it, there is a potential that the carriage will cause abrasion of the yarn while travelling back and forth.  See my post from November 2017 for an illustration of this problem. 
 So I am knitting several rows of  waste yarn to take any abrasion that might occur.  The next step is to put all these needles in hold position until I am ready for them, and when I reach row 58 and it is time to join the 2 pieces I will "frog" or unknit the rows of waste yarn and return my garment yarn to the needles.  Note also that my weights are hanging from the waste yarn I used to cast on, not from my garment yarn.  The weights can distort stitches, but the waste yarn smooths out the uneven tension. 

In the meantime, I will knit the sleeve, reversing the logic used above to reverse the slope of the wedge piece.  I dreamed (literally) last night that I should use a crochet row on the right side of the garment to reinforce the edges of the sleeves.  I dreamed of doing 3 rows of crochet, every other row, but realized on waking up that could cause issues due to the short-rowing.  So I'll just use one row to give a firm edge.  

I thought you might get a laugh from seeing the "industrial-size" cone of variegated rayon yarn I am using for this project.  The yarn on the left is a normal-sized cone of Tamm Varsity that I won as a door prize at Spring Fling.   There is literally no chance I will run out of yarn.  Part of my dream last night involved making an entire wardrobe from these yarns.   


Sunday, May 27, 2018

Down the Rabbit Hole

I went down the rabbit hole this weekend, but at least I didn't come home with any Angora rabbits!  I visited the Great Lakes Fiber Festival in Wooster, Ohio.  It was kind of an expensive weekend, as the Ohio State Highway Patrol kindly reminded me on the Lincoln Highway that Ohio is a little more serious about going slow and paying attention to speed limits than the Michigan State Police are.    This happened after I visited the Fiber Festival.  I tried to play on the trooper's sympathy by telling him I had been at the Fiber Festival, after all, I am a grandmotherly type, wearing my hair in a bun - a little old lady in tennis shoes.  He didn't care.  He gave me a driving award.

As I drove up, I heard the sound of an auctioneer.  I believe the sheep were being auctioned off.  This fiber fest is a livestock event as well as a spinner's and knitter's paradise.

I saw a few people I knew. A fellow machine knitter from Youngstown, Ohio; and my "Fiber Arts and Social Media" instructor from the Michigan Fiber Festival last year.  I visited all the vendors, but knew Carol Larsen (dyer)  and Candy Haenzel (Angora Rabbits).  I walked around. taking it all in,  until I could hardly walk any more.
A view down the aisle of one of the vendor buildings.

I bought a few things:  A colorful basket from Ghana, a Celtic shawl pin, and some wool yarn for my students at Fiber Fest in Allegan.  I wanted to buy a lot more things but I managed to restrain myself.

Copyright 2018 Brightmeadow Knits
I've been thinking about the sweater I am designing.  Earlier this weekend I visited JoAnn Fabrics and took a look at the Marcy Tilton Vogue pattern I am basing my design on.  JoAnn has Vogue patterns on sale on June 1 for about $5.00, so I will purchase it then.  I am really curious about the approach the designer took with the lower back panel.

In the meantime, I've been working on another design that is quite a bit simpler. At right is my rough sketch of how I envision it will look. Please note: I have no formal training in fashion illustration!

Instead of the 10 pattern pieces needed for the other sweater, this new design will have only 3 panels.  It is a kimono.  I am making a short-length sleeve version, which will hit at about the elbow.  The sleeves are combined with the fronts and back, and I will be knitting it sideways.
Garment Designer Pattern Pieces


  While I was at JoAnn's I purchased some lightweight striped knit fabric, to make a "muslin". (Color choices were somewhat limited!)  A muslin is another word for a test garment.  I created the pattern in Cochenille's Garment Designer.  I displayed the pattern full size, and printed it out, and taped the individual pages together to make the full-size garment pattern.  Then I cut out the pieces for the test garment, and sewed them together at shoulders and sides using the serger.  I was a little concerned about the test garment edges fraying, so I stabilized them by turning the hem up over a 1/2 bias tape, and used a cover stitch machine to fasten it down.  The dart didn't seem like it would take up much fabric, so I eliminated it for now.  I may decide later it is a good design line and stitch it in with a standard sewing machine.

Then I tried it on.
 I think it fits pretty well, although I did not achieve the diagonal line in front that I had hoped. The diagonal wants to hang at the neck instead of the hem.   I may adjust the pattern to bring the center front up another inch or two.  I didn't use any fasteners on this test garment, so before I make changes to the pattern I will play with using a shawl pin on the outside and a hook and eye on the inside to bring the neckline edge a little further up. Perhaps I need another inch or so of ease in the hip to make that work.  Also I think the lower sleeve is a little loose, but then, that is the style of a kimono.  I may adjust slightly.  I stayed up until 2:00 am pinning and stitching the edges down.  Test garments are supposed to be quick and easy!


Here's my swatch for the machine-knitted  garment:  It is from a cone of Tamm Varsity variegated  I won as door prize in Spring Fling, carried along with a cone of a variegated industrial rayon I won a few years ago as a door prize in Monroe.  I love the way the shades of the two colors play against each other. The swatch fabric is quite a bit heavier than the test garment fabric, so that may make a difference in the hang of the garment.   In order to knit this garment in this yarn combination, as swatched, on a standard gauge machine, I need 197 needles at the widest part.  To knit in another yarn, I have to achieve less than 6.6 stitches per inch gauge on the standard bed of 200 needles. Using either of these yarns alone does not yield the necessary stitch width, but together they are perfect.

Corrected 5/29/2018, the garment is the short-sleeve version.


Wednesday, May 23, 2018

Picot Edges

In my Machine Knitting 101 class last weekend, one of the students asked a question about my instructions for the picot edge. 

A picot edge is created when the turning row for the hem has eyelets worked in it. When the hem is turned, the stitches between the eyelets magically turn into little points or "picots", to use the French term. 

This finish can be accomplished by transferring every other stitch on the turning row to the adjacent needle manually.  If you have a lace carriage, you can pull forward and select every other needle, then transfer all stitches to the next needle using one pass of the lace carriage.

My instructions said to set the tension DOWN one full number for the turning edge.  My student was surprised, because on a hung hem, normally you turn the tension UP one full number to allow the edge to turn.


My reason for tightening the tension is that the eyelets or holes formed by the picots allow the necessary slack for turning. This replaces the looser tension of the turning row on a plain hem.  By tightening the tension, you get sharper picots.  To demonstrate this principle, I made some swatches on the standard gauge machine.
Unblocked

  The photo above shows unblocked examples.  The one on the left is made with the tension turned up one notch to a higher tension.  The middle sample shows a picot edge using main garment tension.  The final sample, on the right, shows a "graded" tension.  The main tension was 5.  Five rows of the hem were knitted and tension reduced to 4.  Five more rows were knitted and tension reduced to 3. Five rows were knitted, the picots were formed, five rows were knitted at T3, then the tension was graded back up one full number at a time.  The illustration below shows the same swatches after a light steam blocking and with the yarn ends woven in. 
Steam Blocked

 The turning row for the hem is much softer and rounded when stitch size is increased for the turning row.  The graded tension provides much better stitch definition, and it also has the benefit of reducing any flare in the hem over the width of the complete garment.

I notice that on the first sample the hemline is not as defined on the other two. The reason is that I accidentally made a row of picots too soon.  When hanging the hem, I picked up only the stich on the top of the eyelet on the back side (first row of the hem) and did not try to pick up every stitch.   On the other two samples, I picked up every stitch, and did not increase the tension on the hanging row.   On a real garment, I would take care to soften the hemline as in the first sample by hanging only every other stitch and by increasing the tension slightly on the row knitting the two stitches off the needles. 

The difference between the three samples is subtle to the eye.  You may focus on the shadow below the samples to be better able to differentiate the sharpness of the picot.  Better yet, sit down at your machine and make some samples to prove it to yourself. 

Thursday, May 17, 2018

Waterfall vests and cardigans and other shenanigans

Have you noticed the proliferation of "waterfall" cardigans lately?  Some are extremely exaggerated, and some merely seem to be a "mistake" (according to traditional dressmaking rules) of an exaggerated straight hem on an A-line garment.  I myself have a Nic and Zoe sweater whose exaggerated extensions fall nearly to my ankles.  There is a lot of extra fabric in it, on these side "wings".  I actually like the overall length of this garment but think the extensions with exposed non-functional zippers are a little silly, if trendy.  The zippers do add a nice diagonal line, which is always desirable for those of us in the "round" category.

After taking Susan Lazear's class on designing from an existing garment or from an illustration at Spring Fling, in Peru Indiana, I was inspired. She recommends using Garment Designer to copy the garment based on the garment measurements, or estimating the garment measurements by analyzing the proportions against your body type.  For example, if an illustrated garment is fingertip-length, you can find the length measurement by finding another garment in your closet that is fingertip-length and measuring it.


For the last several weeks,  I've been adding to the collection of pictures of garments that I think are  
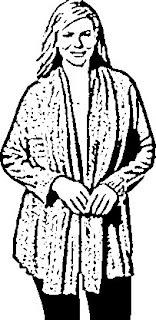
My Style on Pinterest.  I noticed that the favorite garments in my closet are cardigans with shawl collars that have a lot of fabric on the front, enough to close the garment with a shawl pin or brooch if I want to, or to leave open.  Some of these are "waterfall" cardigans, but some, like the Karen Scott one at the left, which I adore, are not. At least according to my definition of waterfall!  Traditional cardigans without the shawl collar tend to fall open around my bust while wearing them, drawing attention to my extra curviness, and not being flattering.

So I was looking for, and collecting, garments that met that specification on many different plus-size websites.  I came across many articles on style for over-50 and plus-size women, and I also found many different recipes for dressing different shapes.  I am an "apple" shape, and I was pleased to find that several of them recommend my favorite garment shape for my body type.

Garment characteristics that are flattering to an Apple shape:
  • V-neck 
  • Diagonal lines
  • A-line 
  • Garment that skims the body, not hugging it
  • Asymmetrical shapes
  • 1/3 to 2/3 proportions or Golden Mean relationship to other pieces of the outfit or garment colors

One garment in particular was very exciting to me.  The pattern is Marcy Tilton's Vogue 9322.  I may have been drawn to it by the lime-green color of the sample garment.

Aside: I had my colors done a few years ago, and was surprised to learn I am a "warm spring".  All the blacks and reds and blues and greys in my existing work wardrobe were draining the energy from me, both visually and mentally! I've since drifted toward a brighter secondary color palette and notice that I have more energy.

Back to designing for knitting: The garment is a vest, with an extended collar. It has an A-line shape, and princess seaming.  At first glance, the side pieces appeared to be made from one piece, front and back together in the pattern company flat drawing.  However, upon zooming in and examining the lime green version photo, I can see a seam under the model's arm.  This is better because it means smaller pieces to be knitted on the machine. This can be a problem for plus sizes.  Just grading a pattern up, with certain yarns, may require more than 200 needles.    It has pockets that extend beyond the hemline of the garment.  Even though the original is a vest, I plan to knit it as a long-sleeved sweater.

The upper back is an inverted triangle ending at the waistline.  This means the garment lines from the back resemble an "X", tricking the eye into seeing a classic hourglass shape.  Unfortunately, the sizes are pattern-company sizes, not ready-to-wear sizes, meaning that the largest size is for bust 48 inches.  So if I were to purchase the pattern, I would have to alter it anyway.

It will be a challenge to create the pattern pieces on Garment Designer.  I've started, here is what I have so far.
  Since Garment Designer expects you to knit the entire front of the garment as one piece, even if it is a princess style, I will need to figure out how to knit the pieces separately.  It doesn't directly download to the knitting machine.  I will need to work out how to separate the pattern pieces.  This might involve printing a paper version of the pattern, cutting it apart, and then using the Knit Leader attachment for a KH-930.  Or possibly transferring it into Design-A-Knit and knitting on the KH-970, although I have not explored the transfer method yet.  Another alternative might be to transfer the graphics as a pixel-per-stitch graphic into AYAB and knit on the KH-910.    The piece at the right is the "waterfall" back extension.  Notice on the original how that extension forms a ruffle or slight peplum (or maybe a bustle?)  at the back.   I think the original is possibly rectangular, but I wanted a little less waterfall and a little longer coverage.

The collar may also need to be separated, because I may want to design it using a different stitch pattern so that there is interest on both the right and wrong sides of the fabric, since it is turned back.

I also need to think about the stitch pattern I will use for the garment and the finishing of the edges.  My current pattern has bands for the front, hem and cuffs.  There are so many possibilities for the edges, but because of the curves, many of them will be difficult.

I still need to verify the garment length, and work on the collar and curvature of the back seams.  The length of the garment, when adjusted to my body size, does not seem as proportional as the flat drawings of the pattern on the Vogue web site.

I am thinking of printing the pattern out once I have completed my refinements, and making a "muslin" from commercial fabric before I invest time in knitting it.   Marcy indicates that her pattern is suitable for either wovens or knits, and I have lots and lots of fabric in my stash. It wouldn't cost me anything except time!   I never seem to have time for sewing any more!

But, before I start working on this again, I still need to prepare for the class this Saturday, cleaning up and packing up the machines I am taking, doing a final proofreading of the handouts, and printing them off.

Saturday, May 5, 2018

AYAB and Penguicon

There is nothing like a deadline to get you moving.  Especially one where it is public if you miss it.    I've just completed my #Penguicon presentation.  I am happy to report that it seemed to be well-received by most attendees.

I had two sessions:  The first was a background/prerequisite course "Introduction to machine knitting" where I discussed the history of knitting and machine knitting, the technology,  and the  types of fabrics that can be produced.  I passed around acrylic, wool and wool/rayon swatches that exemplified the types of stitches that can be produced on a knitting machine.  Tuck, fairisle, slip stitch (mosaic) and showed slides of various types of patterning mechanisms, internal and external storage on the machines.

The second  session was a discussion of the AYAB knitting machine hack for KH-910, KH-930, and KH-940 model machines.  I demonstrated the AYAB software and spent a lot of time discussing the problems associated with creating a two-color input pixel-per-stitch input file.  I mentioned that Photoshop, GIMP, and Paint.net had been suggested as editing tools. I used Cochenille's Stitch Painter, Paint, and IMG2track as editors.   We created Word Art in Microsoft word and used the resulting image to knit a word "Penguicon"
I showed pieces I knit prior to the conference:


I showed the samples that I had created before the session: a random llama, a cute baby photo, and a cross-stitch design I copied from Pinterest.


There was a positive response to the punchcard designs that I showed, especially when I mentioned the usefulness of a knitting machine that does not require electricity in the event of a Zombie apocalypse. Side note: There was a car in the front of the hotel that was prepped for a Zombie apocalypse, unbeknownst to me.

I showed a design that I intend to re-knit, a Rowan design that I punched manually, and compared it to the punchcards I used to knit it.  Some of the attendees were taking pictures, I hope they hash tag with #Penguicon or #AYAB

Monday, April 16, 2018

Follow up on Spring Fling

  1.  At Spring Fling, I was surprised to learn from Charlene Shafer about CB-2, an electronics package to replace the Control Box that was original equipment on the Brother KH-970.   I need to learn more about this.   Evidently the original electronics are failing, and of course there is no support from Brother any more.  This new product connects to the PC to allow DAK (Design-A-Knit)  to send the stitch pattern and garment outlines to the knitting machine.  I will ask more questions at the DAK seminar which Charlene is teaching in Monroe at the end of the month.  I don't use the KH-970 all the time, but it is my machine of choice. 
  2. I followed up today with Cochenille to get my software sorted out. It was kind of embarrassing to admit that since I purchased this software suite originally so long ago, it came on 3.5" floppy diskettes.  I know I have them somewhere, but since I have moved four times since the original purchase, and have upgraded PC's several times, I have absolutely no idea where the originals are.   Stephanie responded very quickly, and she was very helpful.  After verifying that I had previously purchased the software, she provided links to download the installation package in order for me to migrate the software to my new PC.  I did not follow the directions exactly in the correct order.  I left the HASP key in the USB port while trying to install the driver, so I had to stumble through a couple of reboots.  It was a good thing, because in the middle of the reboots I finally got mad at the annoying virtual keyboard which has been popping up frequently, at reboot and whenever certain applications loaded. I guess Windows assumes I have a tablet PC?  So I finally did some research on how to fix it.  It is amazing how long I will put up with little annoyances.  There was an option turned on in the control panel under Ease of Access that I had not previously noticed.  Turning it off resulted in the virtual keyboard disappearing! Hurray! 
Random design in Stitch Painter. exported as .png pixel to stitch
Now my Garment Designer is installed on my newest PC and working, and includes the Style Sets 1 and 2.  And, Stitch Painter 3 is now working on my PC.  (I have not yet installed the Beading Module)  I tested the theory of creating and exporting a random stitch design created in Stitch Painter as a .png file.  I then opened it up in AYAB and it seemed to work exactly as expected.  I am delirious with happiness, because I did not want to learn to use Gimp or Paint.net  or other new-to-me graphics software that the open source crowd recommended.   I had tried using old version of Microsoft Image Composer and I was NOT happy with the ease-of-use.  But this took approximately 30 seconds to export and import! 
.png file export loaded into AYAB


Original cropped photo
I had also tried IMG2TRK and while it does a great job converting a color photo to grayscale, and is very easy to use, I was wondering how easy it would be to do a fairisle design with a 12-stitch repeat.  (I don't even know where to start with that!) 
IMG2TRK conversion


 So I can use all the wonderful features of Stitch painter like automatic repeating and brushes to design my fairisle, tuck, lace or other patterns using automated features of Stitch Painter.  


IMG2TRK output loaded into AYAB, should be ready to knit. 


So, perhaps I can use the AYAB hack if my KH-970 breaks in the future?  

Questions to follow up on: 

For Victoria Pawlick or Adrienne Hunter - has anyone engineered the AYAB board for the KH-970? 
For Charlene Shafer - what exactly is happening with the KH-970 when the CB-1 breaks?  How much does the CB-2 cost? Who makes it? Are they basing it on the open source AYAB hack? 

To-do's for next two weeks: 

1. Upgrade GD and SP3 onto laptop (I don't have a cable long enough to reach the KH-910 knitting machine, which is the one I where I installed AYAB,  from my desktop)
2. Hook up and knit a design. 
3. Finish presentation materials for Penguicon on history of knitting technology and AYAB hack
4. Connect Video Camera, laptop, projector
5. Practice! 

When Penguicon is over, I want to think about Sponge Bars.  If we can send a man to the moon, why can't we create a needle presser bar that doesn't rot out in a year? 


Sunday, April 15, 2018

MAO Uncensored and Spring Fling

What a week! 

Last week was a pretty intense knitting week.

Monday I attended the monthly meeting of Friends of the Fleece in Allenton, MI (just outside Berville).  I Kitchenered the toes of two pairs of socks that I had previously knitted on my circular sock machine, finishing two more projects toward my Ravelry challenge of completing 25 projects this year.

On Tuesday and Wednesday, Mary Anne Oger was the featured demonstrator in Grand Blanc at the home of Julie Boylan, for a seminar entitled MAO Uncensored.   We all took our knitting machines, to hopefully get some personal problem solving with MAO, but since MAO has so many wonderful techniques and beautiful garments to share, we really did not have much time to knit.  That was OK, because I would really rather spend my time learning from the expert than puzzling things out on my own.

I had taken my modified KH-910 to practice setting up and find out what I might be missing for a remote presentation, in order to prepare for my upcoming Penguicon presentation in May.  That is only two weeks away so I have really got to get that finished, and get some practice on pulling in photos using IMG2TRK to prepare for the demo.  I did find out that I was missing some tools and the cable for my laptop, so it was a good exercise. 

On Tuesday night, I did an inventory of my KnitWords magazines, which Mary Anne published from her Thunder Bay, Ontario, Canada location. I wanted to see how many I had missed.  It turns out that I am only missing issues #1, #2, and #12.  I probably have issue #12 somewhere, since I never throw anything away, and it seems like that would be in the middle of the year.   I intend to create an eBay search for the other two.  I bought several new patterns on CD, and a book "Knitting on the Edge" from Mary Ann.

Thursday was a travel day.   A friend and I drove the five-hour trip to Peru, Indiana, to attend Spring Fling at the Knit Knack Shop.

Mary Anne  was also demonstrating there, as was Arnetta Kelly, Susan Lazear, Carol Wurst, and Sandee Cherry.  There were 5 hour-long sessions per day.  I attended one with Sandee, one with Arnetta, two with Mary Anne, and the rest with Susan Lazear.  If I had to use one or two words to classify each demonstrator, I would call Mary Anne technical and exacting, Sandee stylish and easy, Susan design-focused, Arnetta intensive, and Carol friendly. 

My friend won door prizes both days, as well as the "table" prize on Friday.  I won the table prize on Saturday, so we score four cones of yarn.  Thanks,  Charlene!  I also picked up some sponge bars for my upcoming Machine Knitting 101 class, a couple of Piecework  magazines and some Eucalan from Carol, a vest pattern from Sandee.  Susan checked my records for Garment Designer and Stitch Painter and verified that I have already purchased the Style Sets.

We returned home late last night and just beat the ice storm that hit most of Southeast Michigan today.  I found that Design-a-Knit 8 had arrived in the mail, so installing that is going to be a task for the upcoming week.

Today I finished unpacking the car and did some sorting out of patterns and magazines to make room for my Spring Fling purchases.  I checked my PCs for the Cochenille Software and found that only my oldest working laptop has the style sets installed.  When I turned on the new laptop, it installed a new Windows 10 update.  I was afraid that Garment Designer might have  broken, because after the Windows update completed, the Hasp key did not work when starting the software.  I rebooted the PC and was relieved to find that whatever the problem had been, it appears to have been fixed.

Monday, April 9, 2018

Project Status - UFOs

For Sale: I have two vintage push-button machines in excellent condition. One is a four-button machine $150 and the other is an 8-button machine $175.  Both are Brother models.  I will be listing on eBay in the near future.   

The UFO count is increasing every day.  I have more machines than ever before and the UFOs are multiplying. These are NOT in order of priority. 


1. The unfinished sweater - variety of chunky yarns including Plymouth Chunky colorspun
2. Pillow covers - with a Dark Green Rayon Chenille.  Color in picture is not representative.  The one on left is plain stockinette, the one on the right is tuck stitch.  My plan is to cover all eight of my couch pillows with similar covers.  Next up is a fairisle version with a cream-colored chenille. 
 

3. Finish TKGA Machine Knitting Level 2 swatches.
4. Round yoke Baby Cardigan from Facebook Midgauge Yoke-neck sweaters KAL.
5. Bags to sell in two weeks at Wolcott Mill
6. AYAB demo and presentation for Penguicon 2018, where I will be demonstrating retrofit of KH910 using the Evil Mad Scientist AYAB hack.  (Highest Priority!!!) 

7. The Surprise sweater using Susannah Lewis's  adaptation for the knitting machine, using painter's tape to avoid the abrasion
8. Sock Knitting on CSM
9. Learn to knit mittens on CSM.
10. Finish handknit projects like neck ruffly scarf
There!  I feel better having made a to-do list!

Sunday, March 4, 2018

Charity Knitting

Here are some service projects that you may want to support, to use your leftover yarn and deplete your stash.

In your neighborhood - contact the organization directly to find out if they accept donations, and if there are any restrictions:

  • Local nursing homes, hospice,  and rehab facilities frequently accept donations of prayer shawls, afghans and lap robes.
  • Hospitals may have need for newborn hats, preemie and regular. 
  • Hospitals may have a program for supplying mothers who are without family support with layettes.
  • Schools may need extra hats, gloves, and scarves for students who come to school not prepared for the weather.
  • Churches or social service agencies may collect hats, gloves, scarves and socks for homeless or indigent neighbors. 
  • Charitable knitting clubs at churches or guilds may accept your donation to support their mission (and may ask you to join them).  They may also accept direct donations of your unused stash.  
  • Local knitting clubs may plan "yarn bombings" to promote knitting.  I have never participated in one of these but it seems like it would be a really fun activity.  Although some may take the view that it wastes resources that could be used to warm someone up.  
Wider area: 
Political activism: 
  • March for our Lives - responding to Florida mass shooting, deadline coming soon! 
  • Pussyhat Project -  I don't think I need to explain this, as it has been widely distributed in media.  But people are still donning them to show their support for women's issues!
  • Yarn Mission - combating racism 
Promotion of Knitting (and crochet) 
  • Knit in Public Day  - promotes knitting by encouraging knitters to get out
  • TNNA Foundation - teaching division of the organization that promotes needle arts for the industry

As always, check out any organization that you plan to contribute to, just to make sure that the the organization's administration is actually following through with their mission.  One source of that information is Charity Watch.  Listing these organizations on my page does not signify my endorsement or that I have personally checked them out.  

I have been working on a chart to pull together information from a lot of different sources that highlights the recommended tension setting for each weight of yarn on the various machines. 
Here is what I have put together so far.  I don't have a fine-gauge machine to test various yarns on it, and haven't found any information so far.  I would welcome your comments to improve this.


Monday, January 15, 2018

Left wheel on KH-230

I've just finished handknitting Berroco's Left wheel sweater, using Plymouth Yarn's Encore Colorspun chunky.  See yesterday's post for details about that project.

By the way, I discovered a typographical error in the pattern.  On right front, where it says to inc 1 at beg of next RS row I believe this should be on WS row.

Now I plan to make a similar sweater using the same type of yarn, but in a different colorway, on the machine.  It will require some conversions.

The first decision is which machine to use.  Because the yarn is "chunky" it narrows it down to one of the bulky machines.  There is ribbing on the project, and although I haven't decided for sure how to adapt the pattern,since there aren't enough needles to do a traditional 1x1 full pitch ribbing. I could change to half pitch and knit 4 stitches of ribbing for every 3 stitches in the body, as the instructions are written, or i could do a totally different edging.  Only one of my machines currently has a ribber on it, and that is the KH-230.  The lack of automatic patterning on this model is not a problem if I do ribbing, since the majority of the garment is knitted in stockinette.  If I want to change this to tuck stitch, I would want to dig the KR-260 rubber out of the closet, so I can use the KH-260's punchcard.

But, first, this is a very bulky yarn.  Will I be able to knit it at the pattern gauge? 


The answer is YES! I won't bore you with how long it took me to re-acquaint myself with this older machine and get the tension swatch completed.. (Only two false starts...)


Sunday, January 14, 2018

Completed baby socks, and fitting a plus-size woman's sweater.

Sewn and blocked, and gave to a mutual friend who works near me and lives near the baby's mom.  Can't wait to hear if she likes them!


Meanwhile, I have only two rows and a bind-off to complete on my hand-knitted  "Left-wheel" sweater Pattern.  See the link for a photo of the original design by Berroco Design Team.  I've been working on it as much as possible since the day after Christmas. 

I couldn't wait to try it on, so here us a sneak peek.  Notice the circular needle still in the right front band!  Photo credit: my wonderful husband.


My intention is to make this same sweater (with a few minor fitting changes) in the same yarn, with a different colorway.  Notice how slim the model in the photo is, she is not built like me at all!  The design sizes up, but doesn't really accommodate my roundness.

 This sweater took 8 balls of Plymouth Encore Chunky Colorspun, which does not seem to be widely available any more.  I've purchased a few more balls on eBay to make sure I have enough to complete the project.  The back took exactly two balls,  each side front took exactly one ball, the sleeves each took just barely over a ball.  Really, less than a yard of the new ball was needed to complete the sleeves, and less than a yard was left on each of the front sides. The bands took another two complete balls. I am holding what is left of the skein, and I still have two rows to knit and to complete the bind-off.

For this version, I added a few rows of short-row shaping to the center of the  upper back to accommodate my round back. I knitted two-thirds of the way across the row, wrapped the next stitch, then knitted back, wrapping and reversing again when I reached the first third, then knitting across the rest of the row.  I did this maneuver twice, then a shorter one closer to the neck edge. This will also keep my neck from getting cold.  On the right front I added a short-row "godet" from the bottom to the point of the bust, to give me a little more room in the hip.  Otherwise I knit as directed for the largest size in the pattern.  Using the specified needle size, this yarn knitted up to the exact stitch and row gauge called for in the pattern.

For my revised machine-knit version, I want to make the entire garment just a few stitches larger around, especially the sleeves.  Instead of color-blocking the entire piece, I will mix up the various colors within the pieces.  I will add an inch to the length.  I also plan to keep the short-row revisions already included, and I will add some short rows on the upper left front to avoid the visual distraction of the stripes running uphill over my chest, and allow for a better fit.  Instead of knitting the bands separately, I am currently deciding on beginning with a hem.  Maybe by the time I finish, I won't really be knitting "Left Wheel" any more!  I haven't knitted the gauge swatch yet on the machine, so it will be interesting to see if I can hit the gauge exactly on the machine.

Monday, January 8, 2018

Baby socks!

In my last post I was trying to decide the best/easiest approach to making the stretchy bind-off for a pair of baby socks.  

I decided to use Diana Sullivan's half-pitch method.   I am happy with the result!

Since the baby is a toddler, the small child-size socks in Eileen Montgomery's basic sock pattern were a little too long.


  For this version, I cast on 23 (versus the original 25) stitches in waste yarn.  The waste yarn is bright green in the photos below.  Then I knitted one row of ravel cord, lime green in the photo.  Then I knitted one row, before proceeding to the short-rowed heel, the sole of the foot, and continuing with the toe. 

I modified Eileen's method a little, by hanging a loop on one side every other row, using the sew-as-you go technique, as I knitted the 25 rows for the instep.  This means that I will have one less seam to sew up at the end. Once the instep was complete, I hung the open stitches from the beginning on the adjoining 23 needles, reversing the side from the first sock, so that the seams on both socks will both be on the opposite side of the leg.   I added a couple of plain rows on this sock (purple) before beginning the ribbing,  to force the stripes of the ribbing to begin on the same color as the first sock.


I knitted 36 rows of ribbing on the first sock, but on the second I was more concerned with making sure the last couple of rows were dark blue, so that the socks would match.  I stopped at 35 rows on the second sock. No one is going to count the rows of knitting, but the visual impact of a different edge color would be very noticeable.   I used the half pitch method to knit the last row.  I thought my machine would jam as it knitted very hard with all the extra yarn winding around the extra needles on that row.  Probably that means my ribber needs an adjustment, as I noticed Diana's  machine in her video did not make the awful noise that mine did.  


I bound off using the loop through the loop method that Diana suggested.  As you can see in the photo below, the completed bind-off stretches to nearly double the normal width.


As it is late here, I have decided to sew the seams tomorrow morning when I am fresh.

The sock on the left has the ravel cord and waste yarn removed, and a few loose ends to weave in.  Since there is only one row of ravel cord, it can easily be pulled out, completely separating the waste yarn from the body of the knitting.  I started sewing the seam on this sock.  Due to the random nature of the yarn striping, the stripes do not match exactly.  If I were to force the stripes to meet, the seam would be lumpy.  The sock on the right still has waste yarn and ravel cord in place, and the seam is completely open. 


I am loving the happy colors of this yarn.  I bought it at a LYS (local yarn store) for half off.  It was a lonesome 50 gram ball, the last one in this colorway.  An adult sock normally takes an entire 50 gram ball for one sock, but I was able to get three toddler socks from one ball.  Had I not had to re-knit a couple of times to downsize the sock and fix a mistake in the sew-as-you-go seam, possibly I could have gotten four, but perhaps not, due to color matching. 


Saturday, January 6, 2018

Stretchy rib bind-off

Researching several methods of stretchy rib bind-offs.

1.  Jenny's surprisingly stretchy bind off. 

To execute this bind off, I think the best way is to transfer all the ribber needles to the main bed, then take the stitches off on a circular needle and knit the bind-off by hand.

2. Figure 8 stretchy bind-off  (Diana Sullivan demonstrates on You-Tube)

This bind off also requires transferring all the stitches to the main bed first.  Each stitch is basically manipulated twice.  For a baby sock, this is not terribly large number of stitches. 

3. Bind off in ribbing around the gate pegs (The Answer Lady demonstrates on You-Tube)

This is not quite as stretchy as the above methods, but halfway through the video she explains another way to accomplish this to gain even more stretch.  This method does not require transferring all the stitches to the main bed first.

4. Manipulate the stitches to gain extra length by using the half-pitch feature.  (Diana Sullivan demonstrates this method.) 

This maintains the spirit of Eileen's original instruction.

5. Hand-sewn bind off.  Susan Guagliumi's blog post about how to accomplish a beautiful stretchy bind-off includes a video demonstration. 


I could make several samples and compare results.   That will take a while! 

Child sock fail


I used Eileen Montgomery's pattern to knit these socks in a child size small,  at the request of a neighbor.  The socks are too large, but the opening at the top is too tight.  I used tension 6 for the main tension, and the instructions said to go up 6 tensions for the loop-through-the-loop bind off.  Unfortunately, I could only go up 4 numbers since the highest tension is 10.  And, they are too tight.

I will also deduct 5 rows of knitting from the body of the foot for the length, (it specified 36).

Since these socks are made from the back of the heel, down the bottom of the sock, then the toe is knitted, then the top of the sock, and finally the ribbing, there is not an easy way to remove 5 rows.  That would be easy if the socks were knitted from the toe up or top down.   The seams were sewn with the yarn end at the end of the ribbing, so the seams will need to be un-sewn first, then the loop-through-the loop cast off undone, the ribbing unknitted, the toe unknitted, then remove 5 rows of the bottom, re-knit the toe, re-knit the instep, and finally re-knit the ribbing.

These socks were made from leftovers from other projects.  Maybe I will just keep these as a learning experience and start from scratch with new yarn.

Tuesday, January 2, 2018

Happy New Year!

To all of my followers, friends and family I wish a cozy New Year filled with warmth and good cheer.  I'm trying to incorporate more "hygge" (Danish word meaning natural, cozy and filled with knitted items and candles) or "Gemütlichkeit" (German word meaning almost the same thing,) Wikipedia defines it as coziness, peace of mind, and a sense of belonging and well-being springing from social acceptance.

My township has announced a "Sit and Stitch" group on the first Tuesday of every month.  I went today, only to find that township offices are still closed for the holidays.  I guess they will start next month! 

I am working on pattern "Left Wheel" in a handknitted version.  It is a chunky yarn.  I'm using Plymouth Colorspun Chunky, which has been discontinued in my colors.  I was able to find a few more skeins in a coordinating colorway.  It is my intention to knit a similar sweater again on the machine after I finish the handknit version.  At this rate I am doing more hand-knitting than machine knitting!