Starting at the point I have labeled "2" in the diagram below is the default approach in the Garment Designer instructions, but that will result in having to cast on a large number of stitches at the underarm seam. It will also mean knitting non-continuous pieces. It means that the increases for the angled pieces will result in a jagged seaming edge. I prefer to seam along one-stitch knitted edge. So I am going start instead at the point I have labelled "1" in order to short-row to achieve my smooth seam. I'll start with the angled side and leave it hanging on the needles until I reach the same row with my sleeve.
I have set the zero points (origin points) at the bottom left (for rows) and the middle (for stitches). The diagram (see the red line marked "1") tells me at I will have 100 stitches at the point of a straight line (red line), between the center (0) needle and the right side (100) needle. I cast on with waste yarn and knit several rows, before I knit my seaming row.
I am knitting the wedge marked "1" first, then moving to the wedge marked "2" and continuing up the sleeve. When I reach the underarm, I will knit the two pieces together as one row and continue knitting as normal.
Garment Designer is uniquely visual in the way it prints the instructions. You work from the bottom of the instructions up, the same way you knit your garment from the bottom to the top. The software does the math, but it assumes I started at row 0. Instead, I wanted to start at Row 44! For now, I am ignoring rows 0-43. Since I am short-rowing, instead of increasing I am putting stitches in work. Refer to the instructions in the screen shot below in box labelled "1". Note that the labelling is consistent from the diagram to the shaping instructions, "1" instructions refer to the wedge-shaped piece marked "1" in the diagram.
I knit the first complete row (row 43), my seaming row, using all 100 stitches to the right of 0. So for my first short row (per the chart, row 44) I will pull 7 at the right stitches to working position. Carriage is travelling left to right. I had previously set the method of shaping in GD to shape only on alternate rows, but not strictly. This means I can always shape on the side away from the carriage, knitting the complete row, wrapping, and returning without shaping. The second row (row 45), I pull 7 adjacent stitches to working position and knit back (row 46 has no shaping on this part, shown in box 1 below.) Row 47 I am knitting 15 additional stitches and wrapping, row 48 has no shaping. Row 49, I pull 14 stitches back to working position. I continue on following the chart.
Garment Designer is very visual, as I noted. It is expecting me to be casting on these additional stitches when working from bottom to top. It shows the increases on the left side of the section. Because I am short-rowing and not increasing, I am working on the right side instead of the left side. It is an adjustment I made to achieve the result I wanted. To keep track of where I am, I started my row counter at 43 because that correlates to the lines in the instructions. Notice that rows 50 and 56 have no shaping instructions inside box labelled "1", the shaping for those rows is on the left side of the bed, which does not even have any needles in work at this point. When I reach row 57, I put the last 11 needles in work.
So, I have come to the end of my "wedge" that I created in box 1. When all the needles on the right of 0 are in work, and will remain in hold while I continue knitting the sleeve, or left side of the piece as I face it, there is a potential that the carriage will cause abrasion of the yarn while travelling back and forth. See my post from November 2017 for an illustration of this problem.
So I am knitting several rows of waste yarn to take any abrasion that might occur. The next step is to put all these needles in hold position until I am ready for them, and when I reach row 58 and it is time to join the 2 pieces I will "frog" or unknit the rows of waste yarn and return my garment yarn to the needles. Note also that my weights are hanging from the waste yarn I used to cast on, not from my garment yarn. The weights can distort stitches, but the waste yarn smooths out the uneven tension.
In the meantime, I will knit the sleeve, reversing the logic used above to reverse the slope of the wedge piece. I dreamed (literally) last night that I should use a crochet row on the right side of the garment to reinforce the edges of the sleeves. I dreamed of doing 3 rows of crochet, every other row, but realized on waking up that could cause issues due to the short-rowing. So I'll just use one row to give a firm edge.
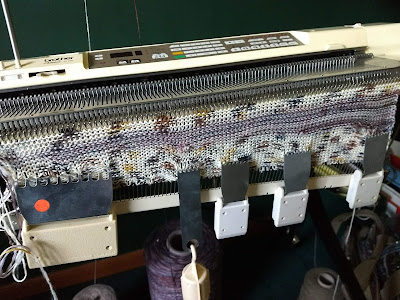
I thought you might get a laugh from seeing the "industrial-size" cone of variegated rayon yarn I am using for this project. The yarn on the left is a normal-sized cone of Tamm Varsity that I won as a door prize at Spring Fling. There is literally no chance I will run out of yarn. Part of my dream last night involved making an entire wardrobe from these yarns.


No comments:
Post a Comment