. brightmeadowknits: machine knitting
Showing posts with label machine knitting. Show all posts

Wednesday, January 6, 2021

Warm Noggins

Have you ever heard of a noggin?  I think my dad used to use that word, as in "use your noggin" meaning to use my brain.   I had to look it up in the online etymology dictionary.  Here's what I found: 

1620s, "small cup, mug," later of the contents of such a vessel, "small drink" (1690s), a word of unknown origin, possibly related to Norfolk dialectal nog "strong ale." OED considers that the similar Celtic words are "no doubt" from English. Informal meaning "head" is attested by 1866 in American English.

I could use a small drink today, while protesters are storming the People's House.  

I've been working on a scarf since the beginning of December. It is off the machine now and I am contemplating the finishing I may want to do.  Possibly a row of bind-off stitches (chain stitch) on reverse side to add stability and stop rolling, or possibly a hand-crocheted edging, or possibly a machine trim like a pie crust edge. 

The materials for the scarf were "A box of Goats" from the Fuzzy Goat local yarn store in Thomasville, Georgia. It was an Advent box, with a gift for each day of December. 15 of the days were mini-skeins of Emma's yarn "Teenie-Tinies" in some luscious colors.  I decided to add in a standard-sized skein of 100 % superwash merino in the same weight from Carodan Farms.  You can find the yarn info under my projects on Ravelry - username is brightmeadow.  I absolutely love both of these yarns, they are so soft they feel like a pima cotton T-shirt, and they have a sheen that makes the scarf gleam as if it was gilded. 

The LYS provided a pattern for a bias, linen-stitch scarf.  I wanted to knit on the machine, and linen-stitch is one of the few stitches which can't easily be duplicated on the machine.  After some thought, I decided to knit a tuck stitch scarf using one of the built-in stitches on my KH-930.  

I did not realize when I started how hard it would be to keep track of which row I was on in the event of a yarn snag or fault to record a row properly.  I had to rip out rows several times to get back to a known point. I was not using a color changer, and every two rows I had to change the yarn in the feeder to the main color or contrast color.  By the time I had knitted about 10 of the mini-skeins, the scarf was getting very long and I was getting very tire.  The last few colors were more intense, so I knitted fewer rows.  

I will be using the remaining yarn to knit fingerless mitts when I get some other projects done.  


The reverse of the scarf has no floats, because it is tuck, not fairisle.  It actually looks pretty on its own. 


Depending on how I tie the scarf, the front or back may show. 


Now that this project is off the machine, I have some additional projects in mind.  First is to knit a hat for my grandaughter.  I was told her coat was dark red, like Anna's in the movie Frozen.  I asked her if she wanted snowflakes or an animal knitted in as a design, and she said snowflakes.  

I knitted a swatch. 


It turns out, though that her coat is really more purple and pink.  So the swatches above will be for a different garment, and I will have to find some pink and purple yarn and make new swatches. 


I also have orders for hats with bicycles on them. Some need to be "Celeste" or Bianchi blue.  Some should be pink. Some should be green and white.  And some are up to me.  


I've washed and dried the swatches, and have been renewing my acquaintance with DesignaKnit 9 to integrate stitch patterns with garment layouts.  I want a border of bicycles, not a repeating, tiled, design.   

I was somewhat surprised to find that although all the yarns are 2/24 acrylic, the gauge is slightly different for each swatch.  The blue is actually 80% acrylic and 20% angora.  The white is 80% acrylic and 20 % nylon.  The red and white in earlier swatch was 2/24 acrylic, and the gauge is different than the yellow/gray hats I made a few weeks ago, which were also 2/24 acrylic.


Friday, June 15, 2018

Michigan Fiber Festival Workshops

I will be teaching three workshops at Michigan Fiber Festival this year.

The first one is sold out.  It is an introduction to Machine Knitting - Machine Knitting 101, and is a full-day class.

Machine Knitting 101 class in Ray Township, MI in May 2018 (Image credit: Cora Foley)
The other workshops are 3-hour workshops. There is still time to register for these, and the cost goes up after July 1, so the time is now.   Click the links to register on the Michigan Fiber Festival Web site.   Check out other workshops on other fiber topics while you are there!

320 - Machine Knitting With Handspun Friday AM By Brenda Fish

 Description: Have you avoided using handspun with your knitting machine because you were told that knitting machines need fine, evenly spun or acrylic yarns to work? This seminar will demonstrate various creative ways to use handspun yarn with a mid-gauge or bulky knitting machine, using techniques such as hand-manipulation, knit-weave, and surface embellishments like embroidery, couching, or felting.
Skill Level: Intermediate
What Students Need to Bring: Small or remnant balls of handspun yarns for sampling and their knitting machine (optional).
Material Fee $5.00. Covers background yarn for samples.


330 - Hacking The Brother Kh910 Machine Knitting With AYAB Friday PM By Brenda Fish

Description: This lecture-style class surveys status and evolution of the latest developments in open-source hardware and software that use home knitting machines from the 1970’s as a foundation. The second half of the class will be a demonstration of replacing the original electronics in a KH-910 with an AYAB (All Yarns Are Beautiful) circuit board and connection to a laptop. Instructor will demonstrate generating a stitch pattern and knitting out a 2-color photo.
Skill Level: All levels
What Students Need to Bring: Note taking materials
Material Fee: None lecture class.  

Llama wall hanging downloaded to KH-910 using AYAB (Image credit: Cora Foley)


Wednesday, May 30, 2018

Short-sleeved kimono (Part 2)

I have been planning how to knit this kimono.   I think it will work best if I start at the lower left garment side (we are looking at the pattern as it hangs on the knitting machine, meaning the wrong side is facing up). 

Starting at the point I have labeled  "2" in the diagram below is the default approach in the Garment Designer instructions, but that will result in having to cast on a large number of stitches at the underarm seam.  It will also mean knitting non-continuous pieces.   It means that the increases for the angled pieces will result in a jagged seaming edge.  I prefer to seam along one-stitch knitted edge.  So I am going start instead at the point I have labelled "1" in order to short-row to achieve my smooth seam.  I'll start with the angled side and leave it hanging on the needles until I reach the same row with my sleeve. 

 I have set the zero points (origin points) at the bottom left (for rows) and the middle (for stitches). The diagram (see the red line marked "1") tells me at I will have 100 stitches at the point of a straight line (red line), between the center (0) needle and the right side (100) needle.    I cast on with waste yarn and knit several  rows, before I knit my seaming row. 

I am knitting the wedge marked "1" first, then moving to the wedge marked "2" and continuing up the sleeve. When I reach the underarm, I will knit the two pieces together as one row and continue knitting as normal.


 Garment Designer is uniquely visual in the way it prints the instructions.  You work from the bottom of the instructions up, the same way you knit your garment from the bottom to the top.  The software does the math, but it assumes I started at row 0.  Instead, I wanted to start at Row 44!  For now, I am ignoring rows 0-43.  Since I am short-rowing, instead of increasing I am putting stitches in work.  Refer to the instructions in the screen shot below in box labelled "1".  Note that the labelling is consistent from the diagram to the shaping instructions, "1" instructions refer to the wedge-shaped piece marked "1" in the diagram.

 I knit the first complete row (row 43), my seaming row, using all 100 stitches to the right of 0.  So for my first short row (per the chart,  row 44) I will pull 7 at the right stitches to working position.  Carriage is travelling left to right.   I had previously set the method of shaping in GD to shape only on alternate rows, but not strictly.  This means I can always shape on the side away from the carriage, knitting the complete row, wrapping, and returning without shaping. The second row (row 45), I pull 7 adjacent stitches to working position and knit back (row 46 has no shaping on this part, shown in box 1 below.) Row 47 I am knitting 15 additional stitches and wrapping, row 48 has no shaping.  Row 49, I pull 14 stitches back to working position. I continue on following the chart.

 Garment Designer is very visual, as I noted.  It is expecting me to be casting on these additional stitches when working from bottom to top.  It shows the increases on the left side of the section.  Because I am short-rowing and not increasing, I am working on the right side instead of the left side.  It is an adjustment I made to achieve the result I wanted.  To keep track of where I am, I started my row counter at 43 because that correlates to the lines in the instructions.  Notice that rows 50 and 56 have no shaping instructions inside box labelled "1", the shaping for those rows is on the left side of the bed, which does not even have any needles in work at this point.  When I reach row 57, I put the last 11 needles in work.


So, I have come to the end of my "wedge" that I created in box 1.  When all the needles on the right of 0 are in work, and will remain in hold while I continue knitting the sleeve, or left side of the piece as I face it, there is a potential that the carriage will cause abrasion of the yarn while travelling back and forth.  See my post from November 2017 for an illustration of this problem. 
 So I am knitting several rows of  waste yarn to take any abrasion that might occur.  The next step is to put all these needles in hold position until I am ready for them, and when I reach row 58 and it is time to join the 2 pieces I will "frog" or unknit the rows of waste yarn and return my garment yarn to the needles.  Note also that my weights are hanging from the waste yarn I used to cast on, not from my garment yarn.  The weights can distort stitches, but the waste yarn smooths out the uneven tension. 

In the meantime, I will knit the sleeve, reversing the logic used above to reverse the slope of the wedge piece.  I dreamed (literally) last night that I should use a crochet row on the right side of the garment to reinforce the edges of the sleeves.  I dreamed of doing 3 rows of crochet, every other row, but realized on waking up that could cause issues due to the short-rowing.  So I'll just use one row to give a firm edge.  

I thought you might get a laugh from seeing the "industrial-size" cone of variegated rayon yarn I am using for this project.  The yarn on the left is a normal-sized cone of Tamm Varsity that I won as a door prize at Spring Fling.   There is literally no chance I will run out of yarn.  Part of my dream last night involved making an entire wardrobe from these yarns.   


Wednesday, May 23, 2018

Picot Edges

In my Machine Knitting 101 class last weekend, one of the students asked a question about my instructions for the picot edge. 

A picot edge is created when the turning row for the hem has eyelets worked in it. When the hem is turned, the stitches between the eyelets magically turn into little points or "picots", to use the French term. 

This finish can be accomplished by transferring every other stitch on the turning row to the adjacent needle manually.  If you have a lace carriage, you can pull forward and select every other needle, then transfer all stitches to the next needle using one pass of the lace carriage.

My instructions said to set the tension DOWN one full number for the turning edge.  My student was surprised, because on a hung hem, normally you turn the tension UP one full number to allow the edge to turn.


My reason for tightening the tension is that the eyelets or holes formed by the picots allow the necessary slack for turning. This replaces the looser tension of the turning row on a plain hem.  By tightening the tension, you get sharper picots.  To demonstrate this principle, I made some swatches on the standard gauge machine.
Unblocked

  The photo above shows unblocked examples.  The one on the left is made with the tension turned up one notch to a higher tension.  The middle sample shows a picot edge using main garment tension.  The final sample, on the right, shows a "graded" tension.  The main tension was 5.  Five rows of the hem were knitted and tension reduced to 4.  Five more rows were knitted and tension reduced to 3. Five rows were knitted, the picots were formed, five rows were knitted at T3, then the tension was graded back up one full number at a time.  The illustration below shows the same swatches after a light steam blocking and with the yarn ends woven in. 
Steam Blocked

 The turning row for the hem is much softer and rounded when stitch size is increased for the turning row.  The graded tension provides much better stitch definition, and it also has the benefit of reducing any flare in the hem over the width of the complete garment.

I notice that on the first sample the hemline is not as defined on the other two. The reason is that I accidentally made a row of picots too soon.  When hanging the hem, I picked up only the stich on the top of the eyelet on the back side (first row of the hem) and did not try to pick up every stitch.   On the other two samples, I picked up every stitch, and did not increase the tension on the hanging row.   On a real garment, I would take care to soften the hemline as in the first sample by hanging only every other stitch and by increasing the tension slightly on the row knitting the two stitches off the needles. 

The difference between the three samples is subtle to the eye.  You may focus on the shadow below the samples to be better able to differentiate the sharpness of the picot.  Better yet, sit down at your machine and make some samples to prove it to yourself. 

Thursday, May 17, 2018

Waterfall vests and cardigans and other shenanigans

Have you noticed the proliferation of "waterfall" cardigans lately?  Some are extremely exaggerated, and some merely seem to be a "mistake" (according to traditional dressmaking rules) of an exaggerated straight hem on an A-line garment.  I myself have a Nic and Zoe sweater whose exaggerated extensions fall nearly to my ankles.  There is a lot of extra fabric in it, on these side "wings".  I actually like the overall length of this garment but think the extensions with exposed non-functional zippers are a little silly, if trendy.  The zippers do add a nice diagonal line, which is always desirable for those of us in the "round" category.

After taking Susan Lazear's class on designing from an existing garment or from an illustration at Spring Fling, in Peru Indiana, I was inspired. She recommends using Garment Designer to copy the garment based on the garment measurements, or estimating the garment measurements by analyzing the proportions against your body type.  For example, if an illustrated garment is fingertip-length, you can find the length measurement by finding another garment in your closet that is fingertip-length and measuring it.
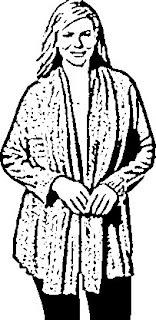

For the last several weeks,  I've been adding to the collection of pictures of garments that I think are  My Style on Pinterest.  I noticed that the favorite garments in my closet are cardigans with shawl collars that have a lot of fabric on the front, enough to close the garment with a shawl pin or brooch if I want to, or to leave open.  Some of these are "waterfall" cardigans, but some, like the Karen Scott one at the left, which I adore, are not. At least according to my definition of waterfall!  Traditional cardigans without the shawl collar tend to fall open around my bust while wearing them, drawing attention to my extra curviness, and not being flattering.

So I was looking for, and collecting, garments that met that specification on many different plus-size websites.  I came across many articles on style for over-50 and plus-size women, and I also found many different recipes for dressing different shapes.  I am an "apple" shape, and I was pleased to find that several of them recommend my favorite garment shape for my body type.

Garment characteristics that are flattering to an Apple shape:
  • V-neck 
  • Diagonal lines
  • A-line 
  • Garment that skims the body, not hugging it
  • Asymmetrical shapes
  • 1/3 to 2/3 proportions or Golden Mean relationship to other pieces of the outfit or garment colors

One garment in particular was very exciting to me.  The pattern is Marcy Tilton's Vogue 9322.  I may have been drawn to it by the lime-green color of the sample garment.

Aside: I had my colors done a few years ago, and was surprised to learn I am a "warm spring".  All the blacks and reds and blues and greys in my existing work wardrobe were draining the energy from me, both visually and mentally! I've since drifted toward a brighter secondary color palette and notice that I have more energy.

Back to designing for knitting: The garment is a vest, with an extended collar. It has an A-line shape, and princess seaming.  At first glance, the side pieces appeared to be made from one piece, front and back together in the pattern company flat drawing.  However, upon zooming in and examining the lime green version photo, I can see a seam under the model's arm.  This is better because it means smaller pieces to be knitted on the machine. This can be a problem for plus sizes.  Just grading a pattern up, with certain yarns, may require more than 200 needles.    It has pockets that extend beyond the hemline of the garment.  Even though the original is a vest, I plan to knit it as a long-sleeved sweater.

The upper back is an inverted triangle ending at the waistline.  This means the garment lines from the back resemble an "X", tricking the eye into seeing a classic hourglass shape.  Unfortunately, the sizes are pattern-company sizes, not ready-to-wear sizes, meaning that the largest size is for bust 48 inches.  So if I were to purchase the pattern, I would have to alter it anyway.

It will be a challenge to create the pattern pieces on Garment Designer.  I've started, here is what I have so far.
  Since Garment Designer expects you to knit the entire front of the garment as one piece, even if it is a princess style, I will need to figure out how to knit the pieces separately.  It doesn't directly download to the knitting machine.  I will need to work out how to separate the pattern pieces.  This might involve printing a paper version of the pattern, cutting it apart, and then using the Knit Leader attachment for a KH-930.  Or possibly transferring it into Design-A-Knit and knitting on the KH-970, although I have not explored the transfer method yet.  Another alternative might be to transfer the graphics as a pixel-per-stitch graphic into AYAB and knit on the KH-910.    The piece at the right is the "waterfall" back extension.  Notice on the original how that extension forms a ruffle or slight peplum (or maybe a bustle?)  at the back.   I think the original is possibly rectangular, but I wanted a little less waterfall and a little longer coverage.

The collar may also need to be separated, because I may want to design it using a different stitch pattern so that there is interest on both the right and wrong sides of the fabric, since it is turned back.

I also need to think about the stitch pattern I will use for the garment and the finishing of the edges.  My current pattern has bands for the front, hem and cuffs.  There are so many possibilities for the edges, but because of the curves, many of them will be difficult.

I still need to verify the garment length, and work on the collar and curvature of the back seams.  The length of the garment, when adjusted to my body size, does not seem as proportional as the flat drawings of the pattern on the Vogue web site.

I am thinking of printing the pattern out once I have completed my refinements, and making a "muslin" from commercial fabric before I invest time in knitting it.   Marcy indicates that her pattern is suitable for either wovens or knits, and I have lots and lots of fabric in my stash. It wouldn't cost me anything except time!   I never seem to have time for sewing any more!

But, before I start working on this again, I still need to prepare for the class this Saturday, cleaning up and packing up the machines I am taking, doing a final proofreading of the handouts, and printing them off.

Saturday, July 29, 2017

new Ravelry Group

If you are a machine knitter and in or near the Thumb area of Michigan, head over to Ravelry to check out Mitten Thumb Machine Knitters group.

Monday, January 9, 2017

Felted fairaisle tablet case (Part 1)

Since I got a new tablet for Christmas, I am making a tablet case from a felted fairaisle piece.  I think it will look artistic and cozy, and also protect the tablet.  Note that the tablet already has a glass screen protector and a plastic case, this is just extra insurance and hopefully a fashion statement.
 It is a true learning experience.  Let me share the journey with you!

Materials: 
Yarn: 
Yeoman Fifty-fifty (white) and mill end acrylic boucle.
Trim: 
leather scraps from an old sofa


Whoa! You say.  " Why is she trying to felt acrylic?"

ANSWER: I have experience with knitting a cardigan sweater with the 50-50 yarn that hubby threw into the dryer.  I knew it would felt.  I also have experience with yarns in fairaisle felting at different rates, leaving a touchable texture, and wanted to get this effect.  Plus, it was what I had available.

You say "I don't have a sofa to take apart" 

ANSWER: Be creative.  Go to a thrift shop and find an old purse to use.

Thread: Coats and Clark Heavy Duty
Stabilizer: tear-away scraps left over from machine embroidery project
Trim/ Hardware: Magnetic snaps, zipper, chain, D-rings, snaps

TOOLS:

Brother KH-930
Vintage White Sewing machine

PROCESS:
 
Step 1.  Decide how much fabric will be needed.  Sketch basic design, and measure tablet.  Figure on about 25% shrinkage.  I skipped the sketching because I had an idea in my head.  Relying on my memory did cause a problem later.

Step 2. KNIT the fairaisle piece. I used built in stitch pattern 10 from Stitch world, but after knitting a swatch, decided I wanted something bolder and knitted the fabric double- high and double-wide. Bind off.

Step 3. FELT the piece. I used standard laundry detergent in our front-loading washer and dryer.  I put it through three cycles before getting the density I wanted.  My original idea was to sew up the flat piece before felting, and insert a plastic block (made from cutting board) to keep the shape.  I had a suggestion from a fellow knitter just to make a flat piece and cut to size after felting, so this is the approach I chose. It seems to felt better if other laundry, like towels, are included in the load, to provide abrasion.

Step 4. Add the leather trim and sew the basic bag.  Since I've really never sewn leather on my machine before, I should have started with my swatch, but I forged ahead anyway. 
   a. I chose to use the vintage cast-iron machine because I didn't want to break any plastic gears in the newer machines.  They don't make them like they used to!
   b. I made sure to use a leather needle and heavy duty thread.
   c.  I used a long stitch length, the longest the sewing machine would support.
   d.  Trim the leather so the edges are straight.
   e. Sew the trim to bag. Sew with leather side up. Use tear- away stabilizer under the fabric to keep it from stretching.
f. Sew the side seam.  Oops, that was supposed to be a center back seam.  That is why I should have made a sketch first.  I can live with it.
g.  Turn inside out and test the fit. Oops again.  Guess I should have measured the leather. Can't live with this.  Good thing I have a whole sofa's worth of leather.  Actually now I am seeing this together, not sure if I like this leather with this fabric.  The leather has gold undertone and the boucle yarn has more of a silver undertone.

h. back to the drawing board.  

i. Right away I see design flaw.  If the flap is attached to the back, it will need to be cut out and attached separately.  Maybe best to make entire flap out of leather.
j. By fitting the plastic block to my bag, I realized I will need a lining.  The fairisle floats are not entirely fasted down, and are snagging on the corners of the block when I try to insert it.

I will come back later and report on the (hopeful) success or failure of this project.  

Meanwhile, I am working on getting familiar with my circular sock machine. I hade a wonderful lesson from a fellow CSM owner and am starting to be more confident. I am also feeling happy because I have been learning to darn socks.  I started a Pinterest board on mending, darning, and repairing things. More to come.


Saturday, February 7, 2015

Newest TKGA Master Machine Knitter Level 1

I submitted my package for level 1 Master Machine Knitter, and yesterday I received it back.  I am thrilled to report that I passed and  I did not have to re-submit anything!  The judge, Uyvonne Bigham, sent along a personal note that mentioned some of our mutual acquaintances in Missouri and Grand Rapids.

She was so nice, and very complimentary on the evaluation.  Succeeding on this project really makes me feel motivated to start knitting more.  There is nothing like positive feedback to build you up and make you happy and ready to change the world.

She even took the time to knit a swatch to illustrate the one criticism she had of my work, which was that I was not hanging the marker stitches for some of my swatches properly.  (I did not mention to her that on one of my swatches I actually FORGOT to hang the stitch markers and so I inserted them after the fact. So, now I am telling the world!)

Here is the hat I submitted:


I'm working on designing a sweater in Garment Designer using a similar yarn that I had spun by Zeilingers from same fleeces, it is DK yarn weight and I am using the bulky machine at tension 5.  I knitted a swatch for it and did not make it so neat and tidy as the work I did for submission, since I am making the swatch simply for measuring the gauge.
 
 
All three sections of this swatch are 40 stitches by 40 rows. First is stockinette, and  I am using the 1x1 punchcard on tuck stitch for the 2nd and 3rd sections.  The middle section is using the tuck stitch at normal setting,  and the section on the right was made using the same punchcard at a double-high setting. I can get more width from the fabric on this setting, even though the fabric is bulkier.
 
Notice on these swatches,  instead of hanging a stitch marker, I left a needle out of work, as I learned when I first started machine knitting. 
 
When designing for a  plus-size person, you must remember that it takes a little more design effort to plan ahead for having the garment sections fit on the available needles of the machine.    There are several ways to accomplish this, and one is to use tuck stitch or slip stitch or a woven design to make the fabric using standard 4 pieces of a sweater, front and back plus 2 sleeves.  All of these techniques result in a larger gauge, with  fewer stitches per inch in the resulting fabric.  This means that you can achieve a wider fabric with fewer needles.
 
Another way to accomplish the end goal of have a garment that fits, is to make more garment pieces. One example is making a cardigan with seam in the back (4 body pieces plus two sleeves) or  using a centered or underarm panel to obtain more width. (6 body pieces plus two sleeves)  
 
Using a fairisle, cable, or other decorative technique to make the additional panel stand out means that the resulting gauge will be different for the panel. In this case, the seaming using mattress stitch will not be quite so easy as if you were to have the same number of stitches on each panel. 
 
The more pattern pieces, the more sewing together must be done.  Sometimes I use a sew-as-you go technique to join the pieces together as they are knitted.  A linker or sewing machine may also be used.  
 
Additional techniques can be used to create a larger garment.  Turning the garment sideways when knitting is often successful for plus sizes because the number of rows is not limited. 

Elizabeth Zimmerman, although a hand-knitter, published a mitered design called "Surprise Jacket" that was translated for machine knitting by Susanna Lewis and published in the short-lived but visually stunning MacKnit magazine.  I think there is also a similar  "origami" jacket in one of the books on my shelf - Is it Kathleen Kinder's book or Susanna Lewis?   Time to do some research, I guess. 


Thursday, August 2, 2012

Harvest and Corn Days

I will be demonstrating spinning, machine knitting, and possibly dyeing with natural dyes, at the Wolcott Mill Farm Park Metropark in Ray Township, MI on August 25 and 26.  Please stop by and visit if you are in the area.

© Bright Meadow Knits Blog · Privacy Policy · Terms of Use
© Bright Meadow Bicycle Blog · Privacy Policy · Terms of Use