. brightmeadowknits

Wednesday, October 21, 2020

Bicycling hat

 Well, I did not use either of the patterns I have created for bicycle hats.  Because we were travelling last weekend, and it is quite a bit more comfortable to do hand-knitting as a passenger in the cab of a truck than machine knitting, I printed off a pattern from Julia Stone on Ravelry and hand-knitted a hat. It took all of the 10 hours in the truck plus a few at the farm. After we arrived home,  I lined it with Polar fleece, sewing the lining in using a stretch stitch on my sewing machine. 

I didn't follow the pattern exactly.  I did not achieve the pattern gauge using the yarn and needles I grabbbed on the way out the door.  So instead of knitting the "large" hat, which would have fit me, I knit the "small" hat knowing it would come out larger.  

The hat is knitted in the round. The pattern had an interesting two-color cast-on technique.  However, the YouTube video referenced by the pattern is no longer available, so I had to come up with my own version of a two-color cast on.  After knitting up to the rider's foot, I could see that the bottom of the hat was flaring  excessively and curling.  I decided to knit a facing.  Using the larger of the two swatches, and the larger set of needles, I picked up and knit every other stitch (easy because it was the CC) for three rows.  Then bound off.  I realized the bind-off was too tight, so I knit one more row, increasing in every stitch by making a stitch from the row below.   This facing has a curl of its own.  If I leave it alone, it curls to the outside, giving an additional border beyond that intended by the pattern writer. 


If I turn it under, I will need to tack it down or stitch it down, probably using an overcast hand-sewn stitch.  This will hide the edge of the Polar fleece, which is a raw edge, and give a more finished appearance.  However, it also marginally makes the hat shorter and I may need to add some earflaps to cover my ears before I am finished. 


Friday, October 16, 2020

Versailles pattern - Manos del Uruguay

 Last week I shared with you my process for turning a graphic into a design.  I have taken the next steps and actually punched a punchcard. 


I also loaded Design-A-Knit 8 onto the desktop computer that I typically use for my blog posts.  I have to leave the CD in the drive as that is their copy protection mechanism, and I had the permanent install on my ancient laptop downstairs.  So I spent a couple of hours re-acquainting myself with DAK. 

I think I have a knittable fairisle design for a hat.    I will start knitting at the crown, knit the fairisle portion, then when I get to the vertical stripes I will turn down the tension by two notches, knit half the rows, do a EON transfer for a picot edge, knit the remainder of the stripes, turn the tension back to the original, then knit the hat lining.  Bind off, gather the ends, and sew the seam.  We'll see how it goes.  


If you follow my other blogs, you know that I sets myself a challenge to plan and execute a bike ride through each of the cities and villages in Ohio that are named after European cities, a Grand Tour of Ohio roads.   The last ride was Versailles.  

I looked for a Versailles knitting pattern and struck gold.  I found that Manos de Uruguay has released  their back library of hand knitting patterns, including a sweater pattern named Versailles.  I'll need to convert it for machine, but I think it is doable.  Click the link to their site to download the pattern. 


I also found a lovely lace shawl pattern named Versailles on Ravelry, but it is not free.  


Saturday, October 10, 2020

Bicycle knits

 I decided to make my own bicycle graphic for knitting.

Step 1 - find a suitable graphic. I found this one that has clean lines. 


Step 2 - download knitters graph paper.  I got mine from Tricksy knitter.  Knitting graph paper is scaled to be more proportional to a typical size of a knitted stitch.  Normally, stockinette stitch is a ratio of 4 stitches to 6 rows, or typically on a machine with standard gauge, 7 stitches to 11 rows.  Using quadrangle graph paper would flatten the design. 

Step 3 - trace the bicycle outline onto the graph paper. 

Step 4 - identify the squares inside the traced outline.


Step 5 - reproduce the design by marking the selected squares.

My first attempt resulted in a design of 24 stitches.  This will not work for a punchcard, because there will be no space between the designs.   To create a design for a punchcard, I would repeat steps 1-5 using a slightly reduced version of the graphic, perhaps printing the graphic at 94 % of its original size.  I could avoid the necessity to repeat this step by first measuring the width of 22-23 stitches on the graph paper, then printing the bicycle graphic to fit the scale.

Step 6 - enter the design into the Knitting machine.   

Step 6a - for machines without automatic patterning, manually select the needles according to the graph.

Step 6b - for punchcard machines, punch the design into a blank card, making sure there is space between motifs.

Step 6c - you can enter the design directly into the control panel of an electronic machine, following the instructions in the user guide for your machine.  On Brother machines, you can then store to disk if you still have a disk drive.

Step 6d - alternatively, you can enter the design into Design-A-Knit as a stitch pattern and save.  

Since I am using my 25-stitch pattern, and an electronic machine, I will proceed with option 6d.

Wednesday, October 7, 2020

Bicycle knits


 I found a reference to this book online and ordered it.


  It arrived while we were away. When we got home I could not wait to see all the bicycle motifs inside.   Alas, the one on the cover is the only two-color motif in the booklet. It is a 39-stitch repeat for a top-down yoke, with increases, there are 8 plain stitches between the base of the panel and four stitches between the wheels.    Sizes go up to a 41.5-inch bust.  This would not work for me, so to knit it will require complete redesign.

There is a pattern for a yoke sweater where the ribs radiate from the neck, referencing the spokes of a bicycle wheel.  Also included are directions for a crocheted basket and handlebar streamers. A men's Aran-style drop-shoulder sweater emulates tire patterns.  They spell it "tyre" as the booklet was compiled by a knit shop in the UK.  There is a felted messenger bag and a lace shawl, a crocheted slouchy hat, and fingerless mittens with diamond-shaped cables inspired by bike frames.  

I've also found a few charts on Pinterest for bicycles.  One is a 24-stitch repeat, suitable for punchcard machines.

I ended up downloading a pattern from Julie Stone Designs on Ravelry for a bike hat and beanie.  It also shows a headband version with picot edging.  There are currently 37 projects using this pattern in Ravelry.  It's a handknit, and not an even multiple of 24 stitches, but I'll work something out.


Saturday, June 6, 2020

Barcelona Top

Last night I stayed up late to finish the front side of my Barcelona top (pattern from Anne Lavene, purchased on etsy.) 

I had a few interesting experiences while I was working.

1. This is the first time I've knitted with my KH-970 since we moved from Michigan a year ago.  I set it up a few months after we moved, but when I couldn't find the setting plates for the ribber, or the brackets to hold the CB-1 box, I stopped.  As you may know, I've been making masks since mid-March, so I haven't been knitting or even working on setting up my knitting studio.   I knew I had the missing pieces, just could not find them.  Hate to buy things I already have, but I almost was ready to do it.  A few days ago I opened a tote bag expecting to find yarn, but there they were! Yay!    I lightly sprayed the carriage with my last can of machine lube before sitting down to knit.

Now the only thing missing is the power cord.

2.  Not having a power cord to power up the CB-1 box meant I had no row counter.  This pattern is published using Anne's visual method.  Meaning that the graphic shows the needle number of the stitches in work at each change in direction.  All the increases and decreases were every two rows, or every four rows.  I figured I could count to four without a row counter, then use the needle numbers for reference as to how many rows I had knitted and where I was in the pattern.

3. A useful skill, lacking a row counter, is the ability to "read" the wrong side of the knit.  I am easily distractable.  I can count to four, but sometimes I got interrupted between the rows where I increased after two rows, and the ones where I increased every four rows.  Being able to see the last increase on each side allowed me to recover my place.

4. One of the interruptions was a bent latch.  I notice that I dropped a stitch. I fixed the stitch.  Then I noticed that 17 rows further down, this same needle had "tucked" instead of knitting the stitch.  This pattern is stockinette.  The yarn is a shiny mercerized cotton. If I let it go, it would be very noticeable flaw in the stitching.   So I laddered down, and latched it up from the reverse side.  Unfortunately when I got to the top I realized I had missed a strand at row 16.   So I repeated the process.  And then I repeated it again when I realized I missed two strands at row 15.  It actually took me four times of dropping and latching up, to fix this one stitch.  Anyone who thinks machine knitting is "cheating" has never machine-knitted.  The latch was only slightly bent, and I was able to bend it back in place with just a little pressure, and had no further problems with it. 

5. I am using a no-name cotton yarn from my stash.  I made three gauge swatches, but none matched the gauge in the pattern.  The first two were made with acrylic yarn but I was way off, so I switched to the cotton.  Especially since this top is something I would wear over a camisole in summer.  I was close at T8, so I decided to chance it and go with T9 for the garment tension.  That's the recommended tension for two of the suggested yarns in the pattern anyway.  It probably won't fit, will be too small for me, but I want to see how knitting this garment works before I knit it again with a more expensive yarn.  I think I'd like to do it in a lace stitch pattern eventually.   My display mannequin is a lot smaller than my actual self. 

6.  I see on Facebook, in the Machine Knitting group, that my friend from Michigan, Julie Boylan, is also making this top!  She has translated it for the mid-gauge and posted a photo.  Her yarn was a tweed. To get the airiness I am looking for in a summer top, I was thinking of doing it on the bulky with a light yarn.   It will require a great deal of translation.

Monday, May 4, 2020

new etsy shop additions

http://www.etsy.com/shop/brightmeadowknits.

I've added new masks to my etsy shop

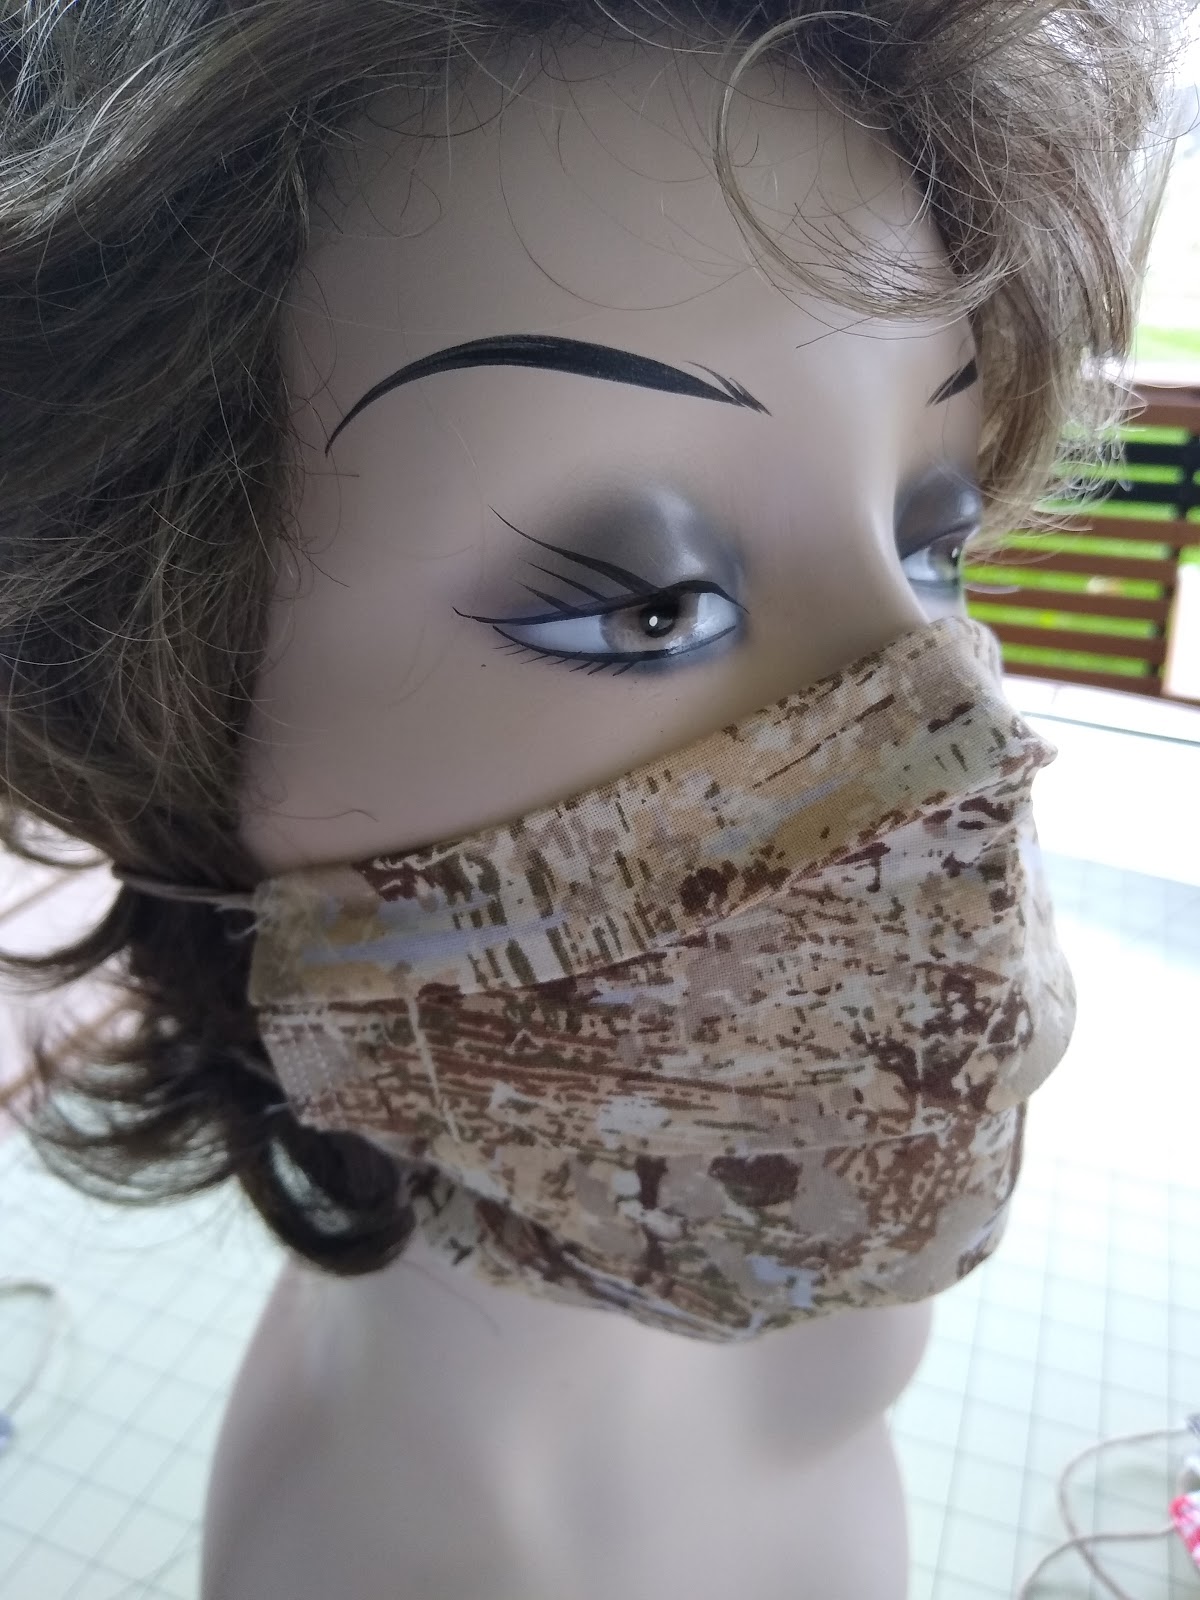
I have two styles, one with a knitted cotton tie, made on my knitting machine, and one that has elastic that fit over the ears.  Both styles have an opening for a filter of your choice, and both have a wire over the nose for better fit.

Tie version

Filter pocket

Shaped mask with opened pleats

Tie version, side view

Elastic version (mannequin has no ears so shown with ear-saver band)

Thursday, April 30, 2020

For the present time, I've turned my knitting studio into a mask sewing studio. I am, however, at least knitting the cords from some cotton yarn in my stash. I made a design change from the masks I was sewing earlier with elastic loops for the ears. I've decided to go with ties for two reasons- a.) Elastic is not available b.) Ties are more comfortable. They do take a little longer to make. I'm donating $5 from sale of each mask to Children's Cancer Research Fund, to support my fundraising for the Great Cycle Challenge, which has been rescheduled to September. I plan to ride from Cincinnati to Cleveland, and also across Michigan, to meet my goal of 500 miles during September.


#mask
#facecovering
#facemask

Http://www.etsy.com/shop/brightmeadowknits

Http://www.greatcyclechallenge.com/riders/brendafish
© Bright Meadow Knits Blog · Privacy Policy · Terms of Use
© Bright Meadow Bicycle Blog · Privacy Policy · Terms of Use