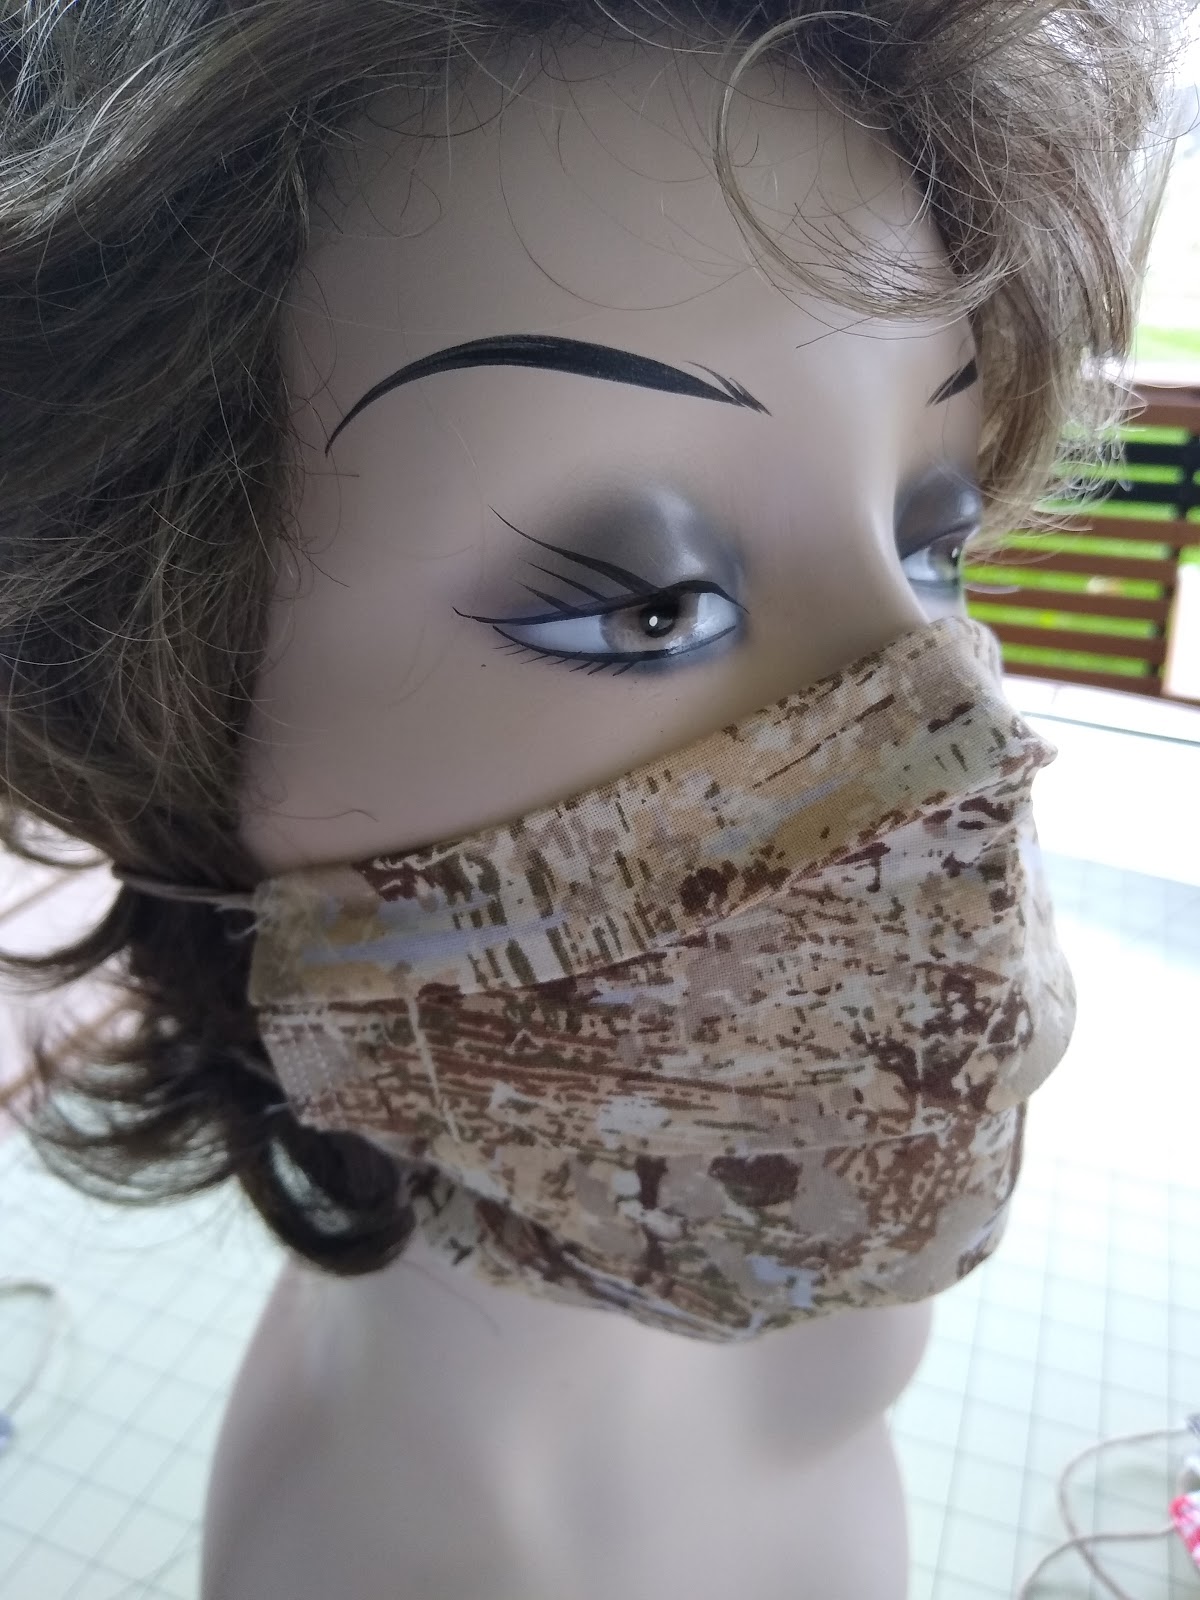
For the present time, I've turned my knitting studio into a mask sewing studio. I am, however, at least knitting the cords from some cotton yarn in my stash. I made a design change from the masks I was sewing earlier with elastic loops for the ears. I've decided to go with ties for two reasons- a.) Elastic is not available b.) Ties are more comfortable. They do take a little longer to make. I'm donating $5 from sale of each mask to Children's Cancer Research Fund, to support my fundraising for the Great Cycle Challenge, which has been rescheduled to September. I plan to ride from Cincinnati to Cleveland, and also across Michigan, to meet my goal of 500 miles during September.
#mask
#facecovering
#facemask
Http://www.etsy.com/shop/brightmeadowknits
Http://www.greatcyclechallenge.com/riders/brendafish
Thursday, April 30, 2020
Tuesday, November 19, 2019
Fairisle Shawl in a Cake
I've been dreaming of knitwear designs. Lately I have been thinking of using the long color changes of hand-painted yarns in fairisle patterns. Random color changes should result in unexpected color combinations. To get started, I knitted some shawls using Lion Brand "Shawl in a Cake" yarn I found on sale at JoAnn Fabrics.
The yarn is lofty. Using it in fairisle will produce a double-thickness fabric, which should be very warm, but also light.
To test my theory I knitted two garments. To keep it simple I decided to use a simple shawl pattern. Just start with a few stitches, increase across the width of the bed, and then put stitches in hold to decrease, Take the stitches out of hold one row at a time, then decrease back down to the few stitches. I had knitted a similar shawl before in undyed wool, in stockinette.
I wanted the color play, which mean I needed fairly wide spots of solid color. But I also wanted short floats. So I picked a "fake cable" card from my stash which alternated 1x1 sections with the cable design, and punched a second card card to match it. I started with the #1 card (1x1) then switched to the cable as the shawl got wider.

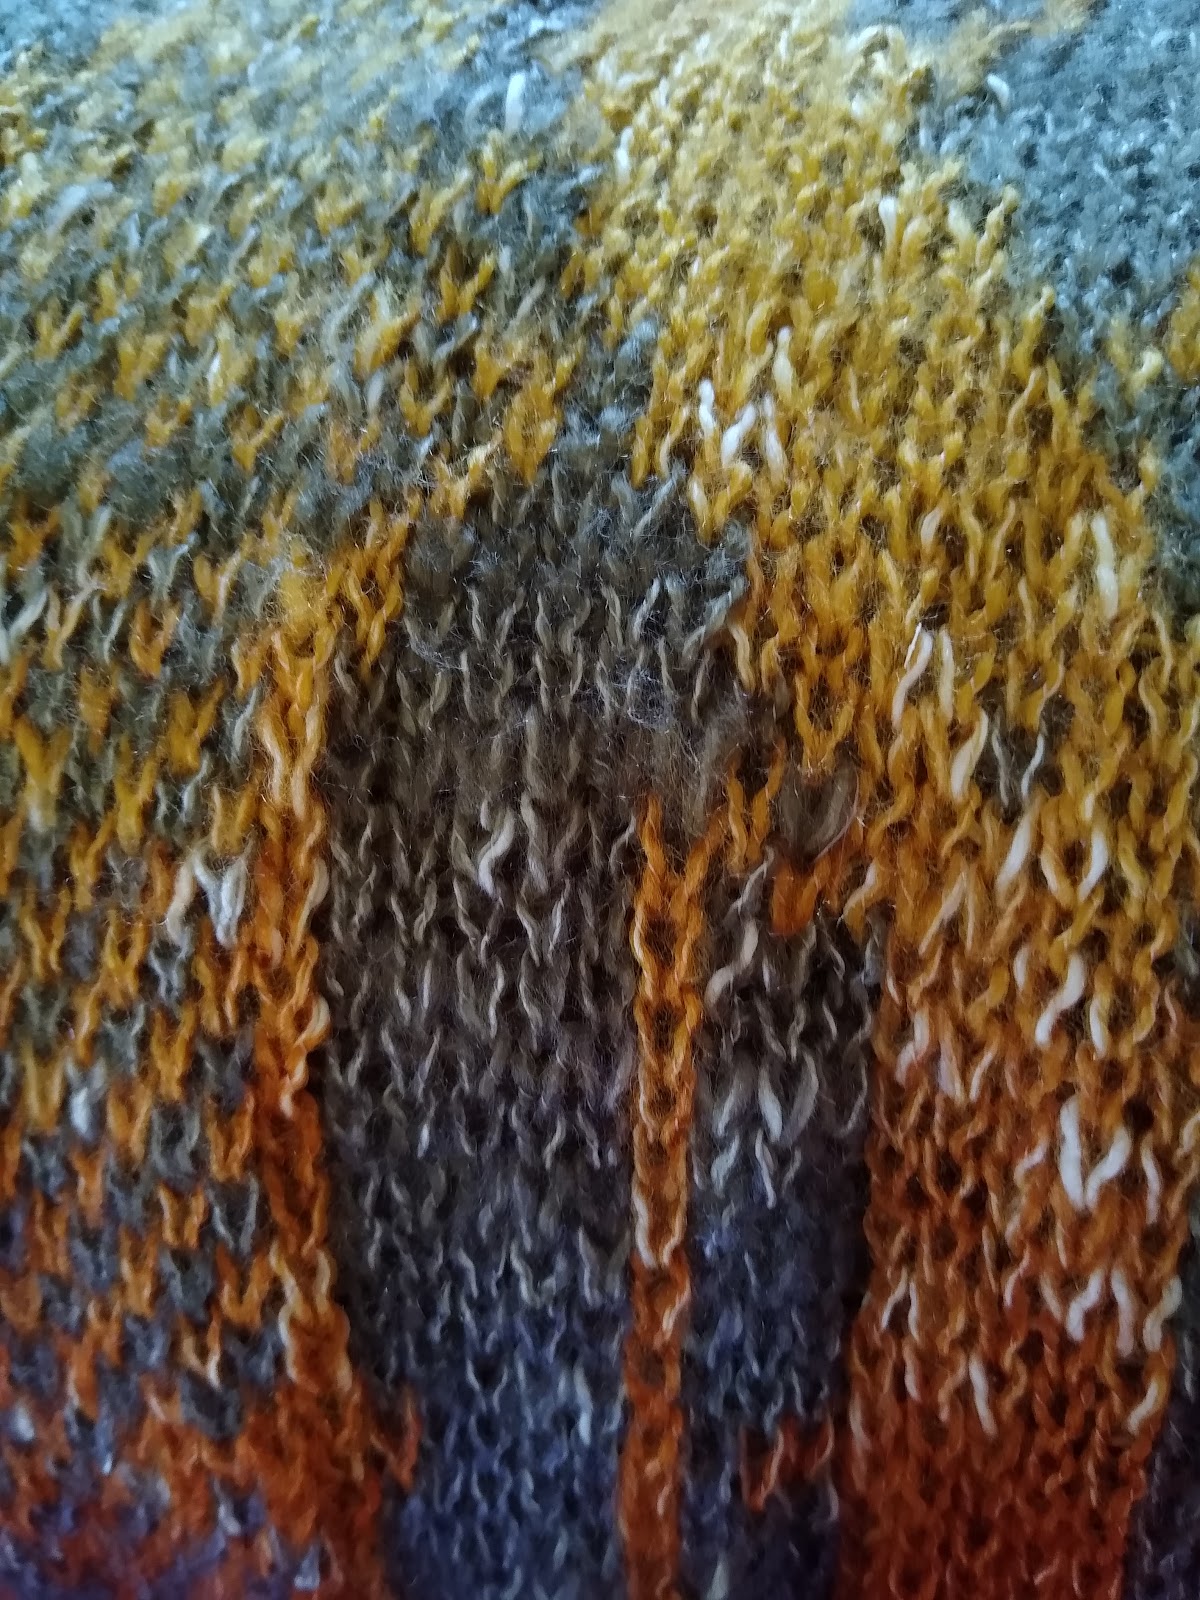
Since my new shawl is a fairisle, the stitch gauge is different. The stitches are taller and skinnier, as fairisle usually is compared to stockinette. As I knitted, adding a twisted and knotted fringe, I noticed that it was taking a long time for the garment to get wide, and a short time for it to get long. I knew I would be unsuccessful to unravel all the twisted fringe, so I would need to complete the garment according an improvisation.. After I got to the point where I had put all the stiches in hold, I could tell I was not going to have enough yarn in the two cakes to complete the shawl according to the original pattern. I decided to stop, and add a border of crochet stitches on the right side of the fabric. I did a crochet cast-on between the needles and the bed. Being a firmer stitch pattern than the fairisle, the crochet stitches gathered in the edge and made it into a graceful curve! You can see how I have to loop the long end around twice, but I think the color changes are very successful. This color was the Calming Desert colorway.

The yarn is lofty. Using it in fairisle will produce a double-thickness fabric, which should be very warm, but also light.
To test my theory I knitted two garments. To keep it simple I decided to use a simple shawl pattern. Just start with a few stitches, increase across the width of the bed, and then put stitches in hold to decrease, Take the stitches out of hold one row at a time, then decrease back down to the few stitches. I had knitted a similar shawl before in undyed wool, in stockinette.
I wanted the color play, which mean I needed fairly wide spots of solid color. But I also wanted short floats. So I picked a "fake cable" card from my stash which alternated 1x1 sections with the cable design, and punched a second card card to match it. I started with the #1 card (1x1) then switched to the cable as the shawl got wider.
Since my new shawl is a fairisle, the stitch gauge is different. The stitches are taller and skinnier, as fairisle usually is compared to stockinette. As I knitted, adding a twisted and knotted fringe, I noticed that it was taking a long time for the garment to get wide, and a short time for it to get long. I knew I would be unsuccessful to unravel all the twisted fringe, so I would need to complete the garment according an improvisation.. After I got to the point where I had put all the stiches in hold, I could tell I was not going to have enough yarn in the two cakes to complete the shawl according to the original pattern. I decided to stop, and add a border of crochet stitches on the right side of the fabric. I did a crochet cast-on between the needles and the bed. Being a firmer stitch pattern than the fairisle, the crochet stitches gathered in the edge and made it into a graceful curve! You can see how I have to loop the long end around twice, but I think the color changes are very successful. This color was the Calming Desert colorway.
For my second attempt, I used two cakes of "Sun Salutations" colorway. I increased two stitches on every other row, instead of one, to make the shawl more squarish than longish. I also decided to dispense with the knotted, twisted fringe in favor of an edging that I added after the basic shawl was completed. The two balls had opposing colors for most of the shawl, but serendipitously, the same color met at approximately the center of the shawl.
Monday, March 25, 2019
New hat pattern available in Ravelry
I have finally published my first pattern in Ravelry! It is the hat pattern I used for the beginning machine knitting class I recently taught at Crafty Lady Trio on Hall Road in Macomb, Michigan.
I made a change to the pattern after I developed it for the class. The change clarified how to ensure that the crown of the hat will be knitted as desired; in reverse stockinette, as shown in the photo with the mushroom-y tan color that I knitted using Plymouth Encore Worsted Colorspun, or in stockinette, as shown in the white hat knitted with a generic acrylic worsted. The trick is the direction of the last row knitted before hanging the lining on the same needles with the outer fabric and knitting them together, before starting the crown, and the direction of the subsequent bindoff. Paying attention to the direction of the carriage means that you do not have to cut the yarn to proceed to the knitting of the crown.
The hat is knitted on a bulky 9.0 mm machine, (I used a Brother KH-260) using a worsted-weight yarn. It is double-thickness around the body of the hat, over the ears, and very warm. It does not require any automated patterning. I originally designed that hat using multiple cables around the head, but needed to reduce the number of cables, because I wanted the students in the class to be able to complete the manual patterning during the time allotted for class. If you like, it would be an easy matter to increase the number of cables by spacing them in between the ones listed in the pattern. Make it your own!
My next step: Update this blog to allow links to Ravelry for purchase. Coming soon! For now, just hop on over to Ravelry and look for Brenda Fish Designs in the pattern section.
![]() |
| Paton's Classic Wool (red), Generic Acrylic (white), Plymouth Encore Worsted (Mushroom) |
![]() |
| Plymouth Encore Worsted |
![]() |
| Generic Acrylic Yarn |
The hat is knitted on a bulky 9.0 mm machine, (I used a Brother KH-260) using a worsted-weight yarn. It is double-thickness around the body of the hat, over the ears, and very warm. It does not require any automated patterning. I originally designed that hat using multiple cables around the head, but needed to reduce the number of cables, because I wanted the students in the class to be able to complete the manual patterning during the time allotted for class. If you like, it would be an easy matter to increase the number of cables by spacing them in between the ones listed in the pattern. Make it your own!
My next step: Update this blog to allow links to Ravelry for purchase. Coming soon! For now, just hop on over to Ravelry and look for Brenda Fish Designs in the pattern section.
Friday, June 15, 2018
Michigan Fiber Festival Workshops
I will be teaching three workshops at Michigan Fiber Festival this year.
The first one is sold out. It is an introduction to Machine Knitting - Machine Knitting 101, and is a full-day class.
The other workshops are 3-hour workshops. There is still time to register for these, and the cost goes up after July 1, so the time is now. Click the links to register on the Michigan Fiber Festival Web site. Check out other workshops on other fiber topics while you are there!
The first one is sold out. It is an introduction to Machine Knitting - Machine Knitting 101, and is a full-day class.
![]() |
| Machine Knitting 101 class in Ray Township, MI in May 2018 (Image credit: Cora Foley) |
320 - Machine Knitting With Handspun Friday AM By Brenda Fish
Description: Have you avoided using handspun with your knitting machine because you were told that knitting machines need fine, evenly spun or acrylic yarns to work? This seminar will demonstrate various creative ways to use handspun yarn with a mid-gauge or bulky knitting machine, using techniques such as hand-manipulation, knit-weave, and surface embellishments like embroidery, couching, or felting.
Skill Level: Intermediate
What Students Need to Bring: Small or remnant balls of handspun yarns for sampling and their knitting machine (optional).
Material Fee $5.00. Covers background yarn for samples.
330 - Hacking The Brother Kh910 Machine Knitting With AYAB Friday PM By Brenda Fish
Description: This lecture-style class surveys status and evolution of the latest developments in open-source hardware and software that use home knitting machines from the 1970’s as a foundation. The second half of the class will be a demonstration of replacing the original electronics in a KH-910 with an AYAB (All Yarns Are Beautiful) circuit board and connection to a laptop. Instructor will demonstrate generating a stitch pattern and knitting out a 2-color photo.
Skill Level: All levels
What Students Need to Bring: Note taking materials
Material Fee: None lecture class.
![]() |
| Llama wall hanging downloaded to KH-910 using AYAB (Image credit: Cora Foley) |
Labels:
Arduino,
AYAB,
machine knitting,
Michigan Fiber Festival,
workshop
Thursday, June 7, 2018
The Zone to knit
I had lunch with my chair yoga class yesterday. Among my fellow devotees was an author. She and I discussed the need to devote a larger block of time to get into "the Zone" for doing your work.
Well, that certainly happened for me today. I started to cast on the required stitches for the back of my sweater. I knit several rows of waste yarn, then changed to the garment yearn. I knit a row. Then I put the needles in hold for the second row. That is when I realized that the tension dial was still set to 4 from my experimentation with various trims, and I needed it to be at 10. Well, I hadn't really gotten very far yet, and I decided to just start over.
Next, I could not find my 1x1 needle pusher. I looked everywhere. I could not find it in the new tool roll I made (photos in an upcoming blog post), or under it. It wasn't in any of the drawers of my rolling cart. It wasn't on the floor, in the lid of the knitting machine, on my chair, in a magazine, or anywhere logical that I could see. I decided to go have lunch.
After lunch, I returned to my workroom and still did not see the tool. So, determined, I used my original tools, my fingers, to move the needles into the 1x1 arrangement. I knitted the first row of waste yarn. What do you know? There was my needle pusher tool, lying on the crossbar of the stand, directly underneath where the carriage had been. Mystery solved.
But, what was wrong with the waste yarn? It was not lying nicely across the needles in working position. Instead, it had sprung up in the air in several places. I manually manipulated it back to where it should have been and hung the cast-on comb. Or at least I tried. I was having trouble getting all the hooks of the cast-on com to catch in the loops of the waste yarn. Static? A disturbance in the force? I hadn't made the proper offering to the knitting gods before starting? Three tries later, I decided to flip the cast-on comb over so that the hooks pointed out. This was successful, in part because I finally realized I wasn't applying enough "drag" to the yarn that I was feeding in as waste yarn, not wanting to take the time to run it through the tension mast. Another problem solved. I finally knitted the required 12 rows to complete the garment side and knitted another 8 rows of waste yarn.
I wasn't really into the Zone yet. I decided to come downstairs and see what was happening on social Media like Facebook and Ravelry. I fully intended to look up my DropBox information to send to a friend to "carch" some files, but it completely slipped my mind until just now.
In the meantime, my eye caught some movement outside the window, and I realized that there was a small turtle dragging his shell across my patio. I ran and got my camera. I wouldn't have really needed to run, because he hadn't moved far when I returned. I snapped several pictures and posted them, and then hung around waiting for some action on his part, which turned out to be not forthcoming.
I got distracted looking at a pattern book or magazine "Pat' s Patterns" from the 1990s. I had remembered a technique for enclosing edges that was demonstrated at a seminar, I think by Pat Frette, and I think I bought the book. So while looking for it, I found this magazine from the other Pat. It has a cute, easy to make Blouse from cotton yarn with a mock V-neck and cap sleeves formed by the excess fabric of the shoulder.. The sleeves are adjusted by a cord through eyelets at the top of the shoulder. There are only two pieces, front and back, and no neckline or armhole finishing required. So this should be an easy, quick garment to finish for wearing this summer. I am pretty sure I have several cones of cotton yarn around here, although probably not the exact brand she used. I'm not fond of the fairaisle pattern across the bust, though, I'll need to adjust that. Wonder if I can get gauge?
So, I'm still not into the Zone, and my sweater back is still waiting for me to go finish it. I don't know how Nancy Zieman accomplished so much in her series 10-20-30 minutes to sew. It's not helping that I don't have a deadline. Maybe tomorrow I need to figure out exactly how much time I have before Fiber Fest rolls around and I have to have my class curriculums completed!
Monday, June 4, 2018
Short-sleeved kimono - Part 3
I've finished the two fronts of the kimono sweater, and am thinking about the binding or trim I will be putting on it. My original idea was that I would use the shiny, rayon yarn alone in the trim. So after I knitted the second front, I knitted another swatch to use for the trims. I tried hanging the bound-off edge with right side facing, knitting a row, turning it with a garter bar, and knitting a 20-row hem (turning on row 10) using a slightly slighter tension because the yarn is a finer yarn. I did NOT like the result. The bound-off edge was stiff, but the tighter tension made the edge wavy. I unraveled it.
I re-hung it with right side facing again, added a second strand of the rayon and used a larger stitch size, knit 2 rows to compensate for the roll of the fabric, then knit 5 rows and hung the hem. Again, this did not work.
I unraveled it again.
I thought about using a "binding" knit and folded in half. I tried it, and didn't like it either.
I am going to have to get out a trim book. I have several. I have hardcopies of Mary Ann Oger's Band Practice and 50 Ways to love your Knitter, and I also have two in my Kindle library by Bonnie Triola "Machine Knitted Trims and Edges." One is for single-bed machines, and the other is for double-bed machines. Probably I have others in my library, but those two (or four, actually) come to mind right away.
I am thinking that perhaps my next step will be to experiment with an industrial rib, since the fabric of this sweater is heavier than the lighter-weight trim. That will mean moving to a a different machine, since the 930 I am currently using does not have a ribber installed. Or, alternatively, installing a ribber on the 930. Decisions, decisions.
Wednesday, May 30, 2018
Short-sleeved kimono (Part 2)
I have been planning how to knit this kimono. I think it will work best if I start at the lower left garment side (we are looking at the pattern as it hangs on the knitting machine, meaning the wrong side is facing up).
Starting at the point I have labeled "2" in the diagram below is the default approach in the Garment Designer instructions, but that will result in having to cast on a large number of stitches at the underarm seam. It will also mean knitting non-continuous pieces. It means that the increases for the angled pieces will result in a jagged seaming edge. I prefer to seam along one-stitch knitted edge. So I am going start instead at the point I have labelled "1" in order to short-row to achieve my smooth seam. I'll start with the angled side and leave it hanging on the needles until I reach the same row with my sleeve.
I have set the zero points (origin points) at the bottom left (for rows) and the middle (for stitches). The diagram (see the red line marked "1") tells me at I will have 100 stitches at the point of a straight line (red line), between the center (0) needle and the right side (100) needle. I cast on with waste yarn and knit several rows, before I knit my seaming row.
I am knitting the wedge marked "1" first, then moving to the wedge marked "2" and continuing up the sleeve. When I reach the underarm, I will knit the two pieces together as one row and continue knitting as normal.
Garment Designer is uniquely visual in the way it prints the instructions. You work from the bottom of the instructions up, the same way you knit your garment from the bottom to the top. The software does the math, but it assumes I started at row 0. Instead, I wanted to start at Row 44! For now, I am ignoring rows 0-43. Since I am short-rowing, instead of increasing I am putting stitches in work. Refer to the instructions in the screen shot below in box labelled "1". Note that the labelling is consistent from the diagram to the shaping instructions, "1" instructions refer to the wedge-shaped piece marked "1" in the diagram.
I knit the first complete row (row 43), my seaming row, using all 100 stitches to the right of 0. So for my first short row (per the chart, row 44) I will pull 7 at the right stitches to working position. Carriage is travelling left to right. I had previously set the method of shaping in GD to shape only on alternate rows, but not strictly. This means I can always shape on the side away from the carriage, knitting the complete row, wrapping, and returning without shaping. The second row (row 45), I pull 7 adjacent stitches to working position and knit back (row 46 has no shaping on this part, shown in box 1 below.) Row 47 I am knitting 15 additional stitches and wrapping, row 48 has no shaping. Row 49, I pull 14 stitches back to working position. I continue on following the chart.
Garment Designer is very visual, as I noted. It is expecting me to be casting on these additional stitches when working from bottom to top. It shows the increases on the left side of the section. Because I am short-rowing and not increasing, I am working on the right side instead of the left side. It is an adjustment I made to achieve the result I wanted. To keep track of where I am, I started my row counter at 43 because that correlates to the lines in the instructions. Notice that rows 50 and 56 have no shaping instructions inside box labelled "1", the shaping for those rows is on the left side of the bed, which does not even have any needles in work at this point. When I reach row 57, I put the last 11 needles in work.
So, I have come to the end of my "wedge" that I created in box 1. When all the needles on the right of 0 are in work, and will remain in hold while I continue knitting the sleeve, or left side of the piece as I face it, there is a potential that the carriage will cause abrasion of the yarn while travelling back and forth. See my post from November 2017 for an illustration of this problem.
So I am knitting several rows of waste yarn to take any abrasion that might occur. The next step is to put all these needles in hold position until I am ready for them, and when I reach row 58 and it is time to join the 2 pieces I will "frog" or unknit the rows of waste yarn and return my garment yarn to the needles. Note also that my weights are hanging from the waste yarn I used to cast on, not from my garment yarn. The weights can distort stitches, but the waste yarn smooths out the uneven tension.
In the meantime, I will knit the sleeve, reversing the logic used above to reverse the slope of the wedge piece. I dreamed (literally) last night that I should use a crochet row on the right side of the garment to reinforce the edges of the sleeves. I dreamed of doing 3 rows of crochet, every other row, but realized on waking up that could cause issues due to the short-rowing. So I'll just use one row to give a firm edge.
I thought you might get a laugh from seeing the "industrial-size" cone of variegated rayon yarn I am using for this project. The yarn on the left is a normal-sized cone of Tamm Varsity that I won as a door prize at Spring Fling. There is literally no chance I will run out of yarn. Part of my dream last night involved making an entire wardrobe from these yarns.
Labels:
Design,
kimono,
machine knitting,
short-rowing,
waste yarn
Subscribe to:
Posts (Atom)